That first hiss from the cooker tells you something good is happening. You stand there, kinda fixated, as the sealing ring does its thing and the valve hiss sounds off like a little steam whistle. You feel the kitchen start filling with that cozy, warm energy that only pressure cooking can bring.

Right away, your senses start waking up. You catch the scent of sass from the sage leaves frying crisp in butter, and that apple cider bubbling into something rich and tangy. It’s like a gentle hint that this gravy is gonna coat your food in the best possible way.
Patience is a tiny virtue here, cause the slow release takes some minutes but you know your float valve doing it’s job means the flavor is sealing in tight. You get the sense this sauce is about to upgrade dinner to something way above average.
What Makes Pressure Cooking Win Every Round
- Locks in flavors quick so you get that deep taste without waiting hours.
- Uses steam and heat to soften ingredients way faster than regular pots.
- Less mess with one pot doing all the work from start to finish.
- You don’t gotta babysit it the whole time, just set the sealing ring and walk away.
- The quick release option helps you stop cooking right when you want, no overcooking here.
- Saving space in a city kitchen cause no need for multiple pans or oven time.
Pressure cooking saves time and amps up flavors in many dishes, including hearty casseroles. The technology locks in moisture and taste fast, making weeknight meals a breeze.
It’s different from slow cookers and ovens, speeding up savory sauces and dishes while making clean-up simple. If you want recipes with rich flavors in short time, mastering pressure cooking techniques like in slow cooker pierogi casseroles can elevate your kitchen game.
Another bonus is versatility. You can easily adapt classic recipes and enjoy the fresh-tasting results at a fraction of the time. For those exploring herbed dough snacks, pressure cooking sauces add complementary depth.
Everything You Need Lined Up
- 4 tablespoons unsalted butter, divided
- 4-5 fresh sage leaves
- 2 cloves garlic, grated
- ½ shallot, grated
- 1 teaspoon worcestershire sauce or a pinch of MSG
- 3 tablespoons all-purpose flour
- 2 cups low sodium turkey broth or chicken stock
- ¾ cup apple cider (make sure it’s cider, not juice or vinegar)
- 2 teaspoons apple cider vinegar
- Kosher salt and freshly cracked black pepper to taste
You wanna have everything ready so the process goes smooth. Butter is split so you get that crispy sage part and then the rich roux. Grated garlic and shallot bring extra flavor dimension, no lumps here. Flour makes that gravy thick and cozy, and turkey broth adds backbone. Don’t confuse cider with sweet juice or harsh vinegar, the right one’s gotta be just balanced for this recipe.
To get that deep flavor, having ingredients prepped and measured makes the cooking smoother. Using quality butter and fresh sage leaves makes a big difference. This lineup of vegetables, flour, and seasonings set the stage for that perfect gravy finish.
Check out related ingredient tips in our Easy Marinated Cheese Appetizer post, which breaks down fresh and pantry items for flavor-packed dishes.
The Exact Process From Start to Finish
Step one, melt 2 tablespoons of butter on medium heat right in your saucepan. Toss in the fresh sage leaves and cook till they let off that fragrance and crisp up a bit, 'bout 1-2 minutes. Then scoop ‘em out and set aside; you’re gonna use those later for garnish.
Next, add remaining butter and toss in grated garlic and shallot. You’re softening these guys for 2 minutes or so, till they smell just right. Soon as that’s done, sprinkle in the flour, stirring like crazy to make your roux. Keep stirring 2-3 minutes till it turns a warm golden brown.
Now pour in that apple cider slowly, whisking all the time to dodge clumps. Then pour in turkey broth, still whisking to keep it smooth. Add that splash of worcestershire sauce or MSG and the apple cider vinegar. Salt and pepper to your taste here too.
Bring the sauce to a gentle simmer and keep stirring occasionally. You want it to thicken just right, which takes 10 to 15 minutes. Taste it, tweak salt and pepper if need be. When ready, pull it off heat, and if you want, toss out the cooked sage leaves you set aside earlier so it looks nice.

Perfect your cooking technique with these steps and enjoy a gravy that’s rich in both aroma and taste. If you like, explore Crispy Mashed Potato Fries as a fantastic side to go along with this sauce for a satisfying meal combination.
Smart Shortcuts for Busy Days
- Use pre-grated garlic and shallots from the store to save peeling and grating time.
- Substitute fresh sage for dried if you don’t got fresh leaves handy but use less since it’s stronger.
- Keep some homemade turkey broth frozen in batches so you just pop some out when you’re ready.
These little shortcuts help you kinda streamline the process without losing that cozy, homey taste. You still get a killer gravy with way less fuss, and hey, every minute counts when you’re juggling everything.
For more time-saving kitchen hacks, see this dump meal recipe that’s quick to put together yet packed with flavor.
Your First Taste After the Wait
The first spoonful, kinda thick and smooth, hits warm and comforting like a cozy blanket. You feel the mellow tang of apple cider dance with the buttery sage notes layering in there. It’s fitting for chilly nights when you wanna wrap yourself in flavor.
The garlic and shallot subtle sweetness shows up next, balancing that savory depth just right. The gravy clings beautifully to whatever it’s poured over, from mashed potatoes to roasted turkey, making every bite better.
That little pop of apple cider vinegar brightens it all up so your taste buds don’t get bored. You catch a hint of freshness in this rich sauce that keeps you dipping in for more.
Don’t miss our Maple Sugared Cranberries recipe to pair a sweet side dish that complements the savory gravy brilliantly for festive meals.
Your Leftover Strategy Guide
- Fridge storage: Pour your leftover gravy in an airtight container and it stays fine for 3-4 days. Just give it a gentle reheat on the stove or microwave, stirring to smooth out any thick spots.
- Freezing: Portion gravy into freezer-safe containers or bags. Freeze up to 3 months. Thaw overnight in the fridge then warm gently. It might thicken, so stir in a splash of broth or water to loosen it back up.
- Quick uses: Besides drenching meat or potatoes, use it as a base for soups or mix into pasta for a fast cozy meal. Leftovers gotta work smarter not harder.
Get ideas for leftover transformations in our classic crockpot pierogi casserole that makes the most of ready meals.
Common Questions and Real Answers
- Can I make this gravy without fresh sage? You sure can! Dried sage works if you reduce the amount, about a third of fresh leaves, since dried is more potent.
- What if I don’t have turkey broth? Chicken stock is a great stand-in, or even vegetable broth if you want a lighter flavor. Just watch your seasoning to balance it out.
- How do I know when the gravy is thick enough? When it coats the back of a spoon and holds a line when you run your finger through it, you’re golden. Cooking longer will thicken it more, but careful not to get lumpy.
- Can I make this in my pressure cooker or just on stovetop? This gravy works great on the stove but you can adapt it inside your pressure cooker using the sauté function then simmer with lid off. Just keep that valve in sealing ring mode for best results.
- What’s the point of the quick release here? Quick release lets you stop the pressure right away once cooking’s done. For this gravy, you wanna use slow release mostly for gentle thickening but quick release saves time if you’re in a rush.
- Can I prepare gravy ahead? Absolutely. It gets better the next day as flavors meld. Store covered in fridge, reheat gently with a splash of broth or cider if it gets thick.
For more kitchen inspiration, browse tasty snacks like easy marinated cheese appetizers to complete your meal ideas.

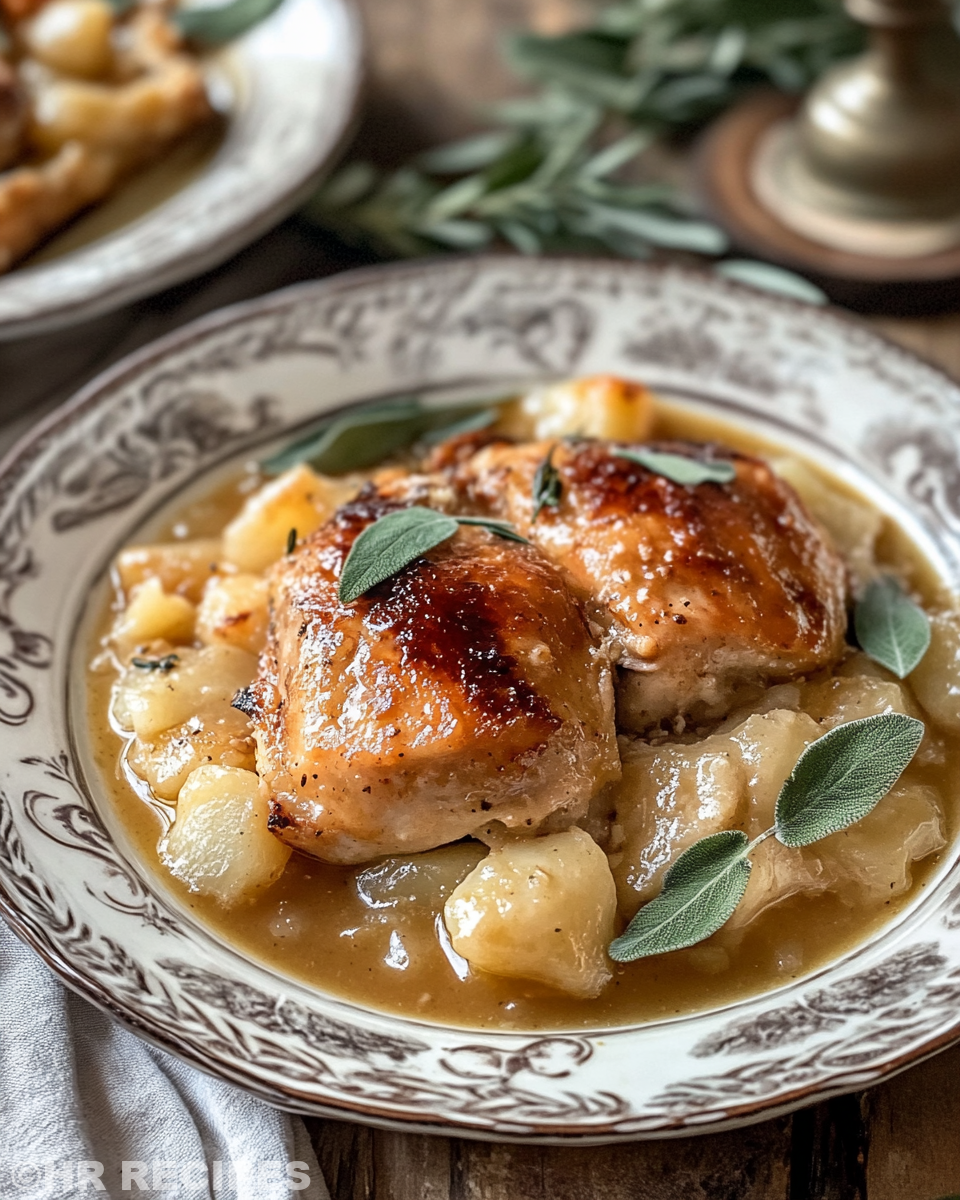
Autumn Sage and Cider Gravy
Equipment
- 1 Saucepan
- 1 Ball whisk
- 1 Microplane Grater
- 1 Wooden Spoon
- 1 Fine mesh sieve
Ingredients
Main ingredients
- 4 tablespoons unsalted butter divided
- 4-5 fresh sage leaves
- 2 cloves garlic grated
- ½ shallot grated
- 1 teaspoon worcestershire sauce or a pinch of MSG
- 3 tablespoons all-purpose flour
- 2 cups low sodium turkey broth or chicken stock
- ¾ cup apple cider not juice or vinegar
- 2 teaspoons apple cider vinegar
- Kosher salt and freshly cracked black pepper to taste
Instructions
Instructions
- Melt 2 tablespoons of butter in a saucepan over medium heat. Add the sage leaves and cook for 1-2 minutes until fragrant and crisp. Remove and set aside for garnish.
- Add the remaining butter. Stir in the grated garlic and shallot. Cook for 2 minutes until softened and aromatic.
- Whisk in the flour and cook for 2-3 minutes until it turns a warm golden brown.
- Slowly pour in the apple cider while whisking to prevent clumps. Then add in the turkey broth, continuing to whisk.
- Add Worcestershire sauce (or MSG), apple cider vinegar, salt and pepper to taste.
- Simmer gently for 10-15 minutes, stirring occasionally, until the gravy thickens to coat the back of a spoon.
- Remove from heat and stir in the last tablespoon of butter for a silky finish.
- Strain the gravy through a fine mesh sieve into a serving dish. Discard any solids. Serve warm garnished with reserved sage leaves.