You catch the smell through the steam vent and suddenly you are starving. It's like this buttery, peanut buttery hug that's swirling around your kitchen. You sorta just stand there with your hand on the cooker, waiting, waiting for those sweet little cookies to be ready.
The sealing ring hums quietly, keeping all that warm steam locked in tight. You remember the last time you tried these. Oh man, nothing beats that tender pull when you sandwich the creamy frosting in between the crisp cookies. You're hooked for life.
Downstairs neighbors might even pop their heads up, smelling the scent of homemade goodness wafting through. It’s that kind of cozy kitchen vibe you just wanna share with everyone. And you gotta admit, the pressure cooker really kicks things up a notch, bringing out this depth in the dough and filling that’s just unreal.
Why Your Cooker Beats Every Other Pot
- Keeps steam cues perfect, so your cookies bake with just the right moisture balance.
- Speedy cooking without sacrificing on that tender, fresh texture you expect.
- The sealing ring locks in flavor and heat so nothing escapes — all that peanut butter goodness stays in your cookies.
- Natural release makes sure you don't overcook or dry out your dough, giving you that soft, tender pull.
- One pot wonder — less mess, less fuss, more time to enjoy your homemade treats.
Your Simple Ingredient Checklist
- 1 ½ cups all purpose flour — standard pantry staple you gotta have.
- 1 teaspoon baking soda — helps your cookies rise just right.
- ¼ teaspoon kosher salt — brings out the sweetness.
- ½ cup unsalted butter softened — creamy base for your dough and frosting.
- 1 cup light brown sugar — adds that deep caramel flavor.
- 1 cup creamy peanut butter — nutty and smooth, star of the show.
- 1 large egg — binds everything together.
- ½ teaspoon pure vanilla extract — little hint of warmth.
- ½ cup sugar to roll the cookie dough in — for that classic crunchy touch.
Walking Through Every Single Move
- Preheat your oven to 350 degrees F and line your baking sheets with parchment paper. This gets you ready for baking, no sticking!
- In a medium bowl, whisk the flour, baking soda, and salt. Set this dry combo aside for a bit.
- Grab a large bowl and beat together half a cup of softened butter, the brown sugar, and a whole cup of peanut butter. Beat until it's light and fluffy — like a sweet cloud.
- Add your large egg and vanilla extract to the peanut buttery mix. Keep beating till it all blends real nice.
- Slowly toss the dry ingredients into the wet mix. Stir till a dough kinda forms.
- Scoop tablespoon-sized balls of dough then roll each one in sugar. Place them on your baking sheets and gently flatten with a fork to create that classic criss-cross look. Pop 'em in the oven for about 10 to 12 minutes, till edges turn lightly golden. Let cool five minutes before moving them to wire racks.
Quick Tricks That Save Your Time
- Use parchment paper on baking sheets to avoid sticky cleanups.
- Softening butter in the microwave for 10 seconds makes mixing quicker.
- Roll dough balls in sugar beforehand so you don’t have to do it after shaping.
- Beat your wet ingredients using an electric mixer to speed things up.
- Prep your dry ingredients while your buttery mix is blending — multitasking saves minutes.
The Flavor Experience Waiting for You
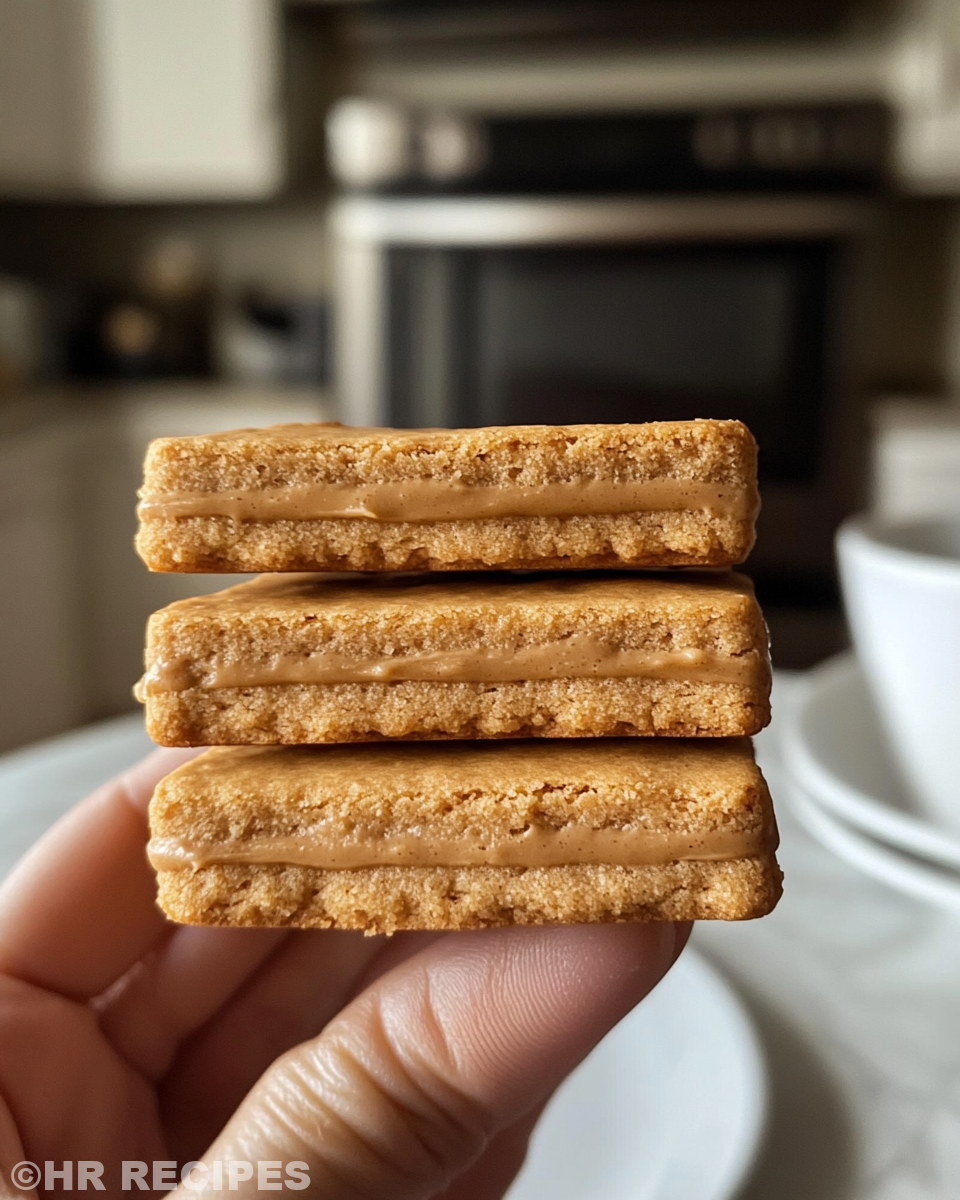
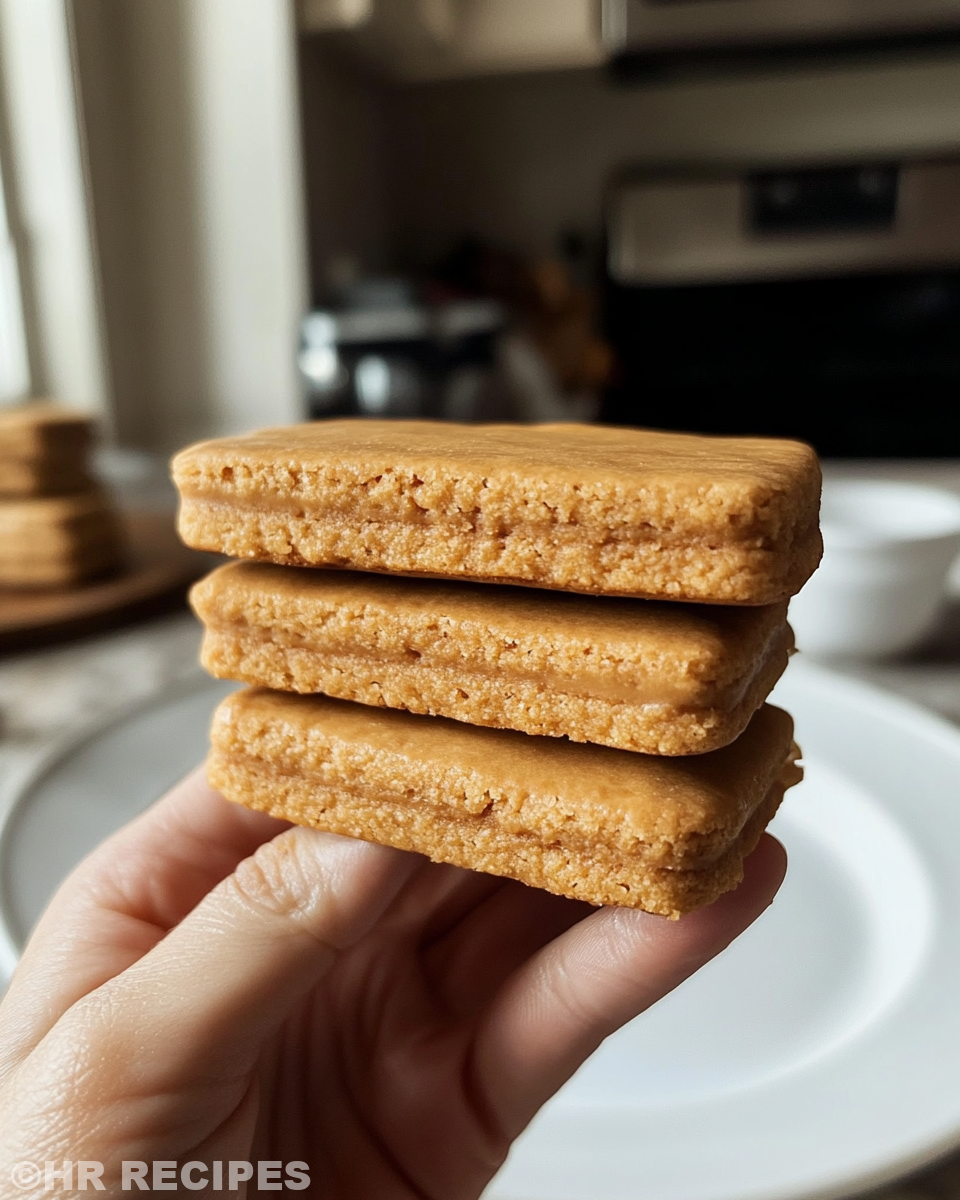
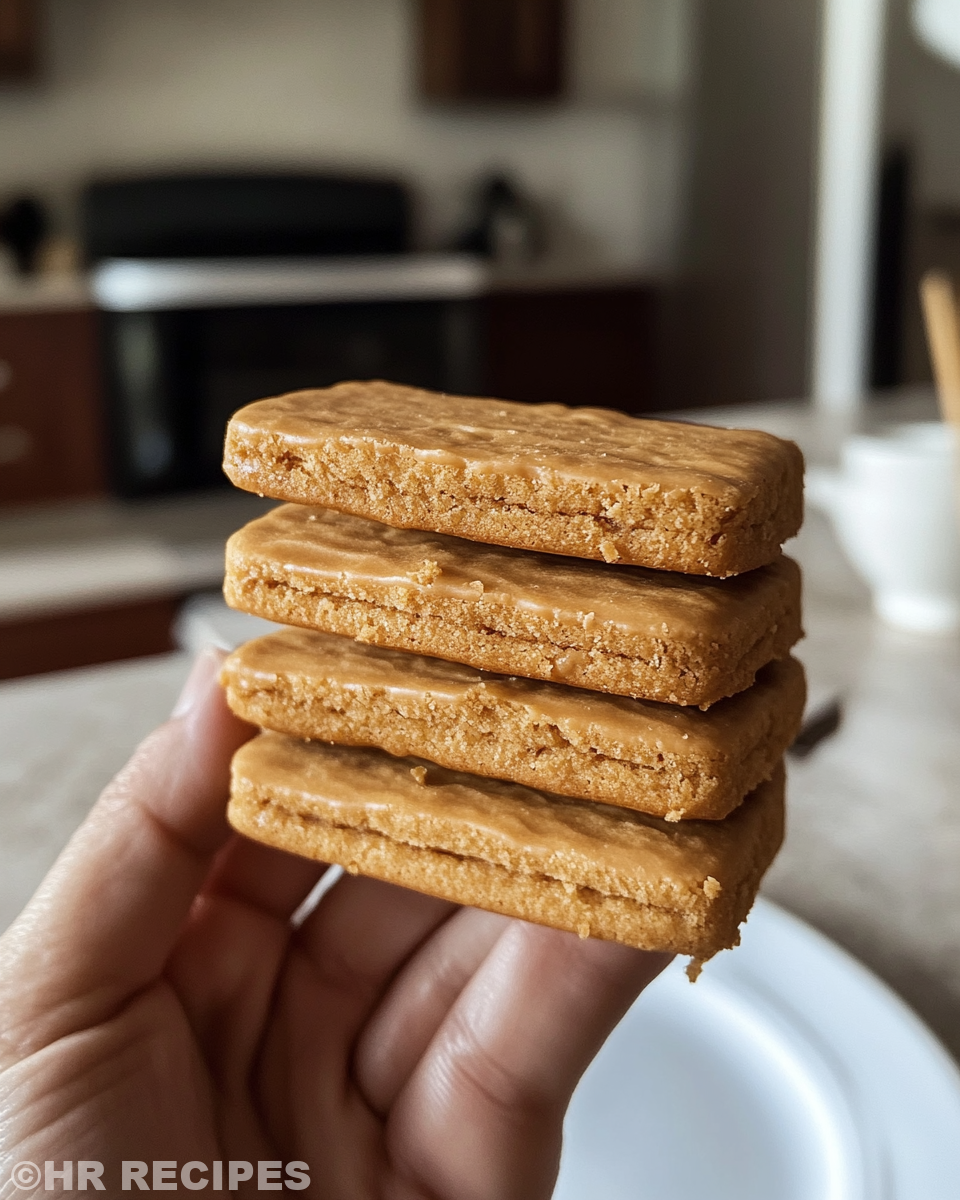
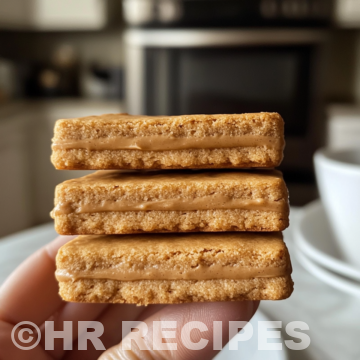
Right as you bite, you spot that crunchy shell giving way to a soft, chewy center. The peanut butter flavor isn’t too shy — it’s full and thick, hugging your taste buds with every chew.
The sweetness is just right, balanced out by the pinch of salt you added, making every bite kinda addictive. It’s not just a cookie, it’s a whole experience, like a little peanut butter party in your mouth.
The filling adds a creamy richness that pairs so good with the textured cookie. It’s smooth, sweet, and makes your tongue wanna dance.
It’s honestly comforting food, the sorta treat you wanna share but secretly wanna keep all for yourself. Your pressure cooker did you proud on this one.
How to Store This for Later
- Keep them in an airtight container at room temp for up to a week. Cookies stay chewy and fresh this way.
- If you wanna save ‘em longer, freeze the cookie sandwiches wrapped tightly in foil or plastic wrap for a couple months.
- When thawing frozen ones, let 'em come to room temp naturally so that tender pull stays just right.
- Store the cookie dough in the fridge for up to 3 days if you want to bake fresh batches anytime.
Your Most Asked Questions Answered
- Can I make these gluten-free? You kinda can, but the texture will change because all purpose flour gives that classic pull. Using gluten-free blends might make ‘em crumbly or softer.
- Do I really need the sealing ring? Yeah, absolutely. It keeps all your steam cues right where they belong for perfect baking.
- What’s natural release when baking? It means letting your cooker lose pressure slowly on its own instead of popping the vent. Helps keep moisture in the dough.
- Can I swap peanut butter for almond butter? Totally. Flavor shifts a bit but you still get nuttiness and creaminess.
- Is rolling dough in extra sugar necessary? It gives that classic crunchy outside and pretty look — ya gotta do it.
- Why does my dough sometimes turn out dry? Could be overmixing or too much flour. Make sure to measure carefully and don’t overbeat once dry ingredients go in.
For more comforting and delicious recipes, check out our Cheesy Kielbasa Hashbrown Casserole Dump Meal Recipe that’s perfect for easy family dinners, or try our Mozzarella Stuffed Rosemary Parmesan Soft Pretzels for a tasty snack with herbs and cheese. And don’t miss the fresh and flavorful Easy Marinated Cheese Appetizer with Salami & Green Olives to impress your guests with minimal effort.
Homemade Nutter Butters
Equipment
- 2 Mixing bowls
- 1 Cookie sheet
- 1 Silicone baking mat
- 1 Electric mixer
Ingredients
All Ingredients
- 1 ½ cups all purpose flour
- 1 teaspoon baking soda
- ¼ teaspoon kosher salt
- ½ cup unsalted butter softened
- 1 cup light brown sugar
- 1 cup creamy peanut butter
- 1 large egg
- ½ teaspoon pure vanilla extract
- ½ cup sugar to roll the cookie dough in
- ¼ cup unsalted butter softened
- ½ cup creamy peanut butter
- 1 ½ cups powdered sugar
- 2 Tablespoons milk
- ¼ teaspoon vanilla extract
Instructions
Instructions
- Preheat your oven to 350 degrees F and line your baking sheets with parchment paper.
- In a medium bowl, whisk the flour, baking soda, and salt. Set aside.
- In a large bowl beat together softened butter, light brown sugar, and a cup of peanut butter until fluffy.
- Add egg and vanilla extract. Mix until combined.
- Gradually stir in the dry ingredients until a dough forms.
- Scoop dough into tablespoon-sized balls, roll in sugar, and place on baking sheet. Flatten gently with fork into criss-cross, then pinch middle to shape like peanuts.
- Bake 10-12 minutes until edges lightly brown. Let cool 5 minutes on baking sheet, then transfer to wire rack.
- To make filling, beat butter and peanut butter until fluffy.
- Add powdered sugar, milk, and vanilla extract. Beat until creamy and thick.
- Pair cookies into matching halves.
- Spread a tablespoon of filling on the bottom of one cookie of each pair.
- Top with second cookie and press gently to create sandwich.
- Store in an airtight container for freshness up to a week or freeze for longer shelf life.