That first hiss from the cooker tells you something good is happening. You hear it right when the sealing ring locks in tight and the pressure starts to build up. You feel the excitement creeping in cause you know the kitchen about to fill up with amazing smells real soon.

The broth depth in this Kung Pao isn’t just some thin sauce. It’s thick enough to coat every bite but keeps that saucy vibe you want from a quick stir-fry style dish. You gotta trust the cornstarch works hard here to bring it all together.
And the tender pull on the chicken. Man it’s something else. Pressure cooking means you get that juicy, fully cooked chicken in way less time than if you tried to slow cook or pan fry. Plus the natural release lets the meat rest and lock in all those flavors just perfectly.
The Truth About Fast Tender Results
- You don’t need hours to get tender chicken when your pressure cooker is doing its thing.
- The sealing ring helps trap moisture so the chicken steams and cooks evenly from all sides.
- Cornstarch thickens the sauce while keeping the balance between glossy and sticky you want in Kung Pao.
- The slow release step prevents juices from spurting out and gives chicken time to stay juicy.
- Natural release locks in flavors better than quick release for saucy dishes like this.
Everything You Need Lined Up
- ½ cup low-sodium soy sauce or tamari (this gives the umami base)
- 3 tablespoons seasoned rice vinegar (for a little tang and punch)
- 1 ½ tablespoons sugar (balance out the heat and vinegar)
- 2 tablespoons cornstarch (thickness comes from here)
- 2 pounds boneless skinless chicken breasts, thinly sliced (your tender protein)
- 2 tablespoons toasted sesame oil and 2 tablespoons vegetable oil (for awesome flavor and good sear)
- 1 red bell pepper and 1 green bell pepper, diced (fresh colors and crunch)
- 3 green onions cut into 2-inch pieces, ½ cup raw cashews or peanuts, 6 garlic cloves minced, 2 teaspoons grated fresh ginger, and dried red chili peppers for heat (this combo is what makes the dish really sing)
How It All Comes Together Step by Step
- In a medium bowl, whisk together soy sauce, rice vinegar, sugar, and cornstarch until smooth. Add sliced chicken and toss to coat. Let marinate 10 minutes so everything soaks in good.
- Heat 1 tablespoon sesame oil and 1 tablespoon vegetable oil in your pressure cooker's sauté mode or a large skillet over medium-high heat.
- Add the marinated chicken in batches if needed. Cook 5-7 minutes until browned and cooked through. Then remove chicken to a plate.
- Add remaining sesame and vegetable oils to skillet. Toss in diced red and green bell peppers. Sauté 3-4 minutes till they get tender but still keep some crunch.
- Return chicken to skillet with green onions. Mix it up so all pieces get coated and cook 2-3 more minutes till heated through.
- Now transfer everything into your pressure cooker pot if you’re not already using it there. Add minced garlic, grated ginger, and dried chili peppers for that heat jump.
- Lock the lid and make sure the sealing ring is set. Cook on high pressure for 6 minutes. Remember the broth depth should just barely cover ingredients to avoid burns.
- Use natural release for 10 minutes so flavors really hang out together. Then slow release any leftover pressure. Done!
Time Savers That Actually Work
- Prep veggies while chicken marinates. Gets you ready without adding more time.
- Use pre-minced garlic and pre-grated ginger like from the store if you’re in a hurry.
- Buy diced peppers if you want to skip chopping but keep fresh flavor.
- Make double batch sauce and keep in fridge to grab next time you wanna whip up this recipe.
- Swap chicken breasts for thigh meat if you find it already cut thin in the store.
Your First Taste After the Wait
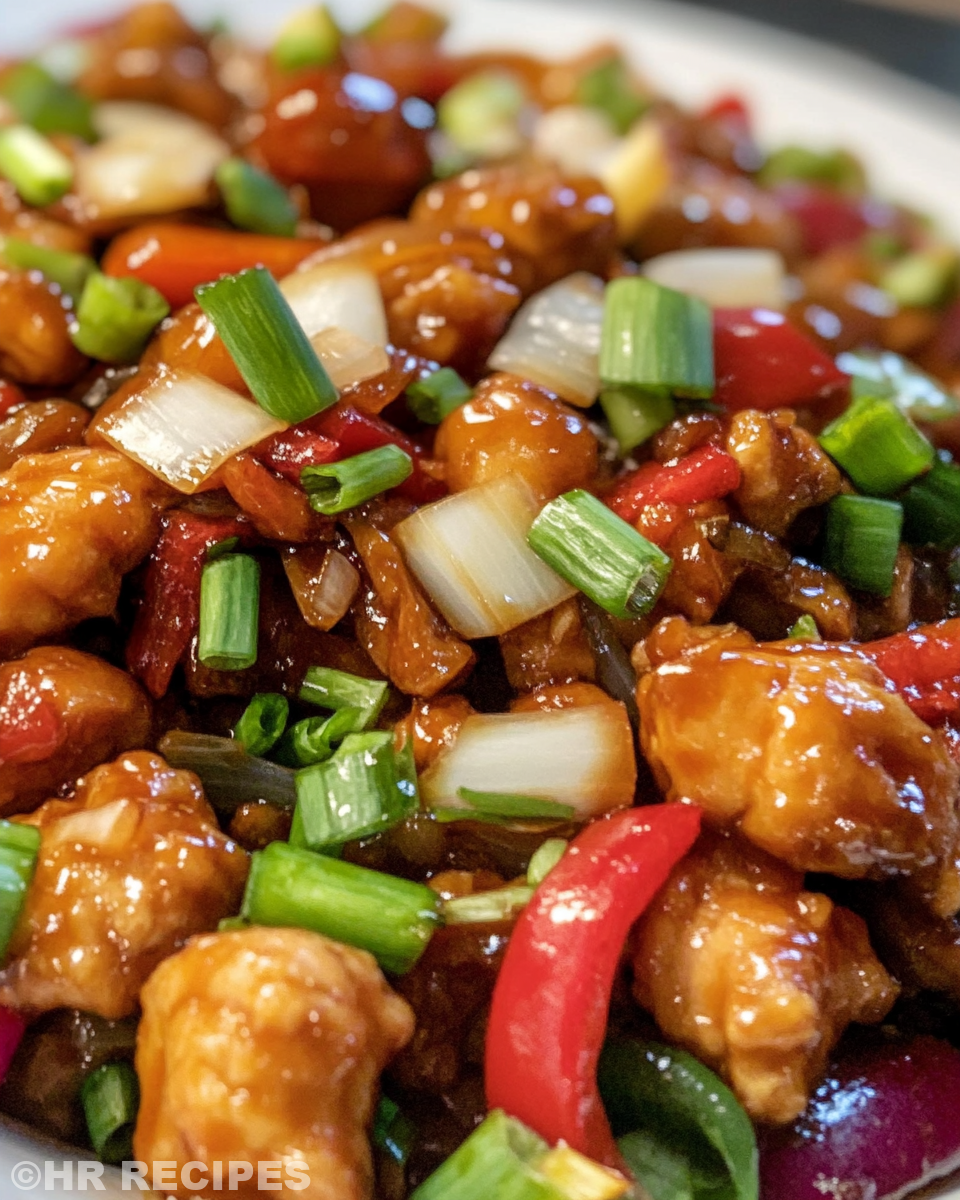
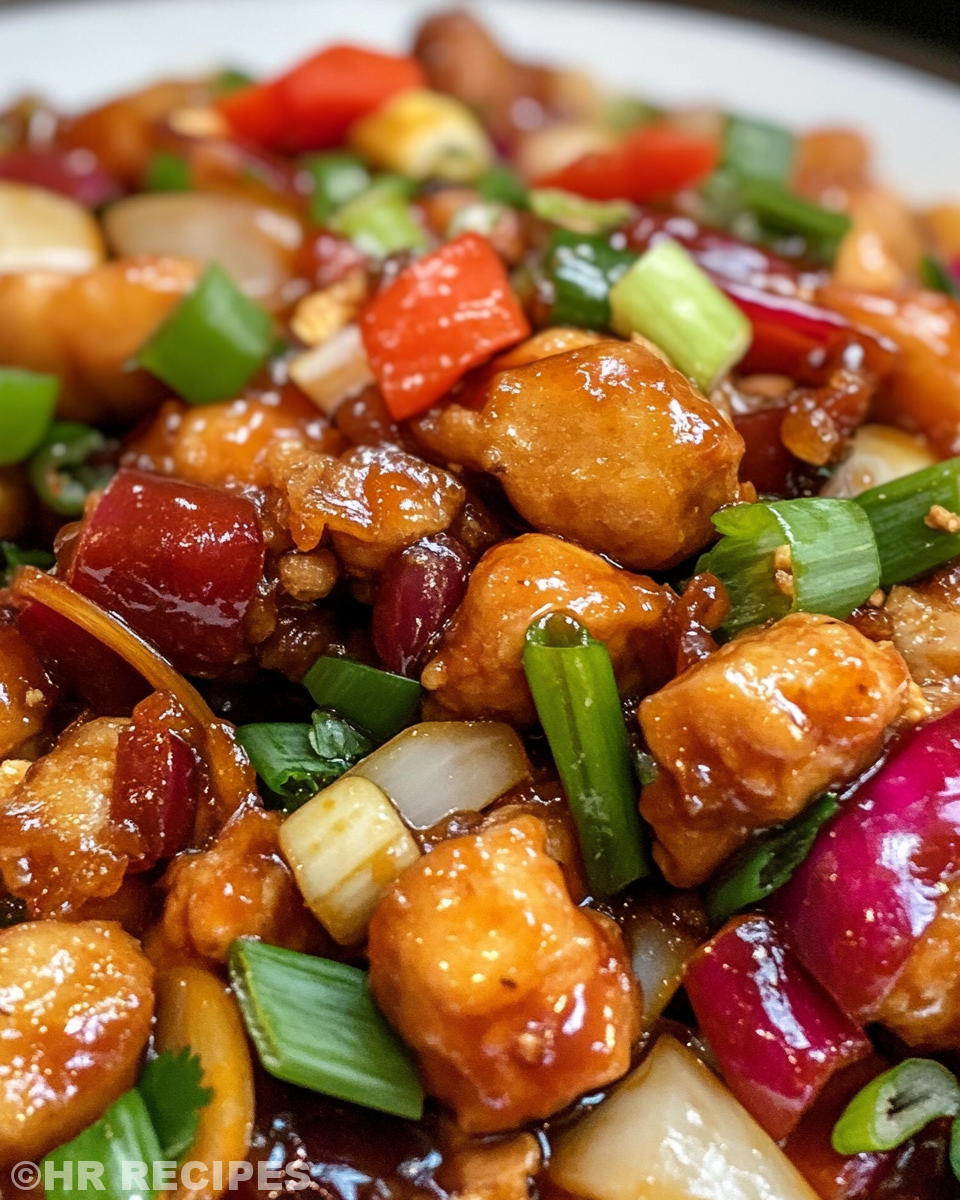
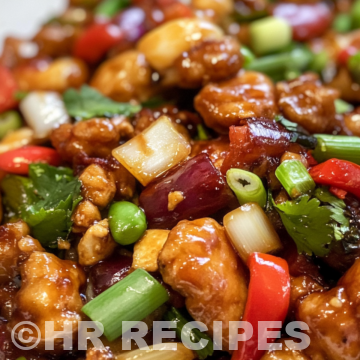
Once you lift the lid, you see the glossy sauce glistening on every piece of chicken and pepper. The aroma hits you with garlic and ginger warmth almost right away.
You catch the heat from dried chilies teasing your tongue but it’s balanced just right by sweetness and tang from the vinegar and sugar. The crunchy cashews give a nice contrast in every bite.
That tender pull from the chicken pairs real good with the snap of bell peppers. It feels fresh and comforting all at once, kinda like all your favorite flavors in one bowl.
This dish tastes like effort, but you know you didn’t have to slave over the stove for hours. That pressure cooker does the heavy lifting so you get dang good results fast.
Smart Storage That Actually Works
- Store leftovers in airtight containers in the fridge. They hold up for 3-4 days easy.
- Freeze single portions in zip-top bags or meal prep containers. Just thaw in fridge overnight before reheating.
- If sauce thickens too much on standing, add splash of water or broth when reheating to loosen it back up.
- Reheat gently on stove or microwave with cover to keep moisture and avoid drying chicken out.
Everything Else You Wondered About
- Q When should I use slow release vs natural release?
A Natural release works best for dishes like this because it lets juices settle and keeps meat tender. Slow release is good if you’re in a pinch but might dry meat slightly. - Q Can I swap chicken breast for thighs?
A Absolutely! Thighs bring more fat and flavor and work great in this saucy dish. - Q What if I don’t have cornstarch?
A You can use arrowroot or tapioca starch. Just same amount to get that sauce thickness. - Q How spicy is this?
A Mild to medium heat, but adjust dried chilies or chili flakes up or down depending on your spice love. - Q Can I pressure cook the chicken right in the sauce with peppers?
A Yep you can but I like to brown chicken first to get better texture. Then pressure cook with sauce and peppers for perfect meld. - Q Why does the recipe say to watch broth depth?
A Too much liquid can trigger burn warning. Just enough to cover bottoms keeps pressure cooker happy and the sauce spot on.
For related recipes, have a look at our Cheesy Kielbasa Hashbrown Casserole Dump Meal Recipe, a great choice when you want something hearty and simple, or try the Mozzarella Stuffed Rosemary Parmesan Soft Pretzels, perfect for snack times with a cheesy twist. Don't miss out on our Easy Marinated Cheese Appetizer with Salami & Green Olives for a tasty and elegant appetizer idea.
Pressure Cooker Kung Pao Chicken: Fast, Tasty, & No Fuss
Equipment
- 1 Pressure cooker
Ingredients
Main ingredients
- 0.5 cup Low-sodium soy sauce or tamari
- 3 tablespoons Seasoned rice vinegar
- 1.5 tablespoons Sugar
- 2 tablespoons Cornstarch
- 2 pounds Boneless skinless chicken breasts thinly sliced
- 2 tablespoons Toasted sesame oil
- 2 tablespoons Vegetable oil
- 1 Red bell pepper diced
- 1 Green bell pepper diced
- 3 Green onions cut into 2-inch pieces
- 0.5 cup Raw cashews or peanuts
- 6 cloves Garlic minced
- 2 teaspoons Fresh ginger grated
- Dried red chili peppers to taste
Instructions
Instructions
- In a medium bowl, whisk together soy sauce, rice vinegar, sugar, and cornstarch until smooth. Add sliced chicken and toss to coat. Let marinate 10 minutes.
- Heat 1 tablespoon sesame oil and 1 tablespoon vegetable oil in pressure cooker on sauté mode. Add marinated chicken in batches. Cook 5–7 minutes until browned and cooked through. Remove to plate.
- Add remaining oils to skillet. Toss in diced red and green bell peppers. Sauté 3–4 minutes until tender yet crisp.
- Return chicken and add green onions. Mix and cook 2–3 minutes until heated through.
- Transfer everything to pressure cooker pot. Add garlic, ginger, and dried chili peppers.
- Lock lid and set sealing ring. Cook on high pressure 6 minutes. Use natural release for 10 minutes, then slow release remaining pressure.