
That first hiss from the cooker tells you something good is happening. You know that sound, right? It's the valve hiss releasing the steam, a sign the sealing ring is doing its job and your cookies are cooking up just right. That hiss tells you, hey, the pressure's building and soon you'll have a treat waiting for ya.
When you hear that hiss, you kinda get excited to peek inside. But hold on, you gotta wait for the steam cues and the natural release to really bring out the best textures in these red velvet cookies. Pressure cooking works a bit differently than your usual baking, but man, it turns out some real good results if you trust the process.
Y'all probably think baking cookies in a pressure cooker sounds a little wild. I did too, but once you trust that steady hiss and pay attention to the broth depth at the bottom to keep the cooker happy, you get these thick, soft, perfectly moist red velvet cookies. It's kinda like a secret technique that makes your kitchen smell amazing real quick.
Why This Recipe Works Every Single Time
- You use cold cubed butter to control the dough texture, so your cookies come out thick and chewy, not flat and greasy.
- The pressure cooker keeps the moisture locked in with the sealing ring, helping the cookies stay soft and tender inside while getting slightly crisp edges.
- The cocoa powder adds just the right depth of chocolate flavor without overpowering the classic red velvet yumminess.
- The white chocolate chips melt gooey inside the cookie body, giving each bite a luscious contrast to the cocoa and red velvet flavors.
- Following the steam cues and trusting natural release is key for even cooking, so you don't end up with underdone or tough cookies.
Everything You Need Lined Up
- 1 cup unsalted butter, cold and cubed
- 1 cup brown sugar, packed
- ½ cup granulated sugar
- 2 large eggs
- 2 tablespoon red food coloring
- 1 tablespoon cocoa powder
- 1 teaspoon vanilla extract
- 2 ½ cups all-purpose flour
- 1 teaspoon baking powder
- ½ teaspoon baking soda
- ½ teaspoon salt
- 1 ½ cups white chocolate chips
Having all your stuff ready before you start helps you keep your rhythm. Those cold butter cubes gotta be cold to get the dough thick and chunky, just like at Levain. The combo of brown and granulated sugars gives a nice caramel vibe, which pairs real good with the cocoa and vanilla.
Don't skip the baking powder and soda; they each do their part to get your cookies risen nicely. And the white chocolate chips are the big finish x-factor they that melt into little creamy bites. You'll want to keep your flour measured well since too much leads to dry cookies, and too little means your dough gets too loose for the cooker.
Your Complete Cooking Timeline
- Gather all ingredients and prep your cooking gear. Get your pressure cooker ready, and make sure the sealing ring is clean and well-fitted so no steam escapes during cooking.
- Cream together the cold cubed butter with both sugars until you get a light and fluffy mix. Don't rush this part since it builds your cookie's structure.
- Add the eggs, red food coloring, and vanilla extract to the butter mix. Mix everything well until you get a nice red velvet color with creamy texture.
- In a separate bowl, whisk the flour, cocoa powder, baking powder, baking soda, and salt. This pre-mix helps your dry ingredients blend even in the wet dough.
- Gradually add the dry mix into the wet batter. Stir gently just until you don't see flour anymore. Overmixing can toughen the dough, so keep it easy.
- Fold in those white chocolate chips slowly so they spread evenly through the batter without breaking up much.
- Instead of oven baking, scoop big dollops of dough on a piece of parchment paper inside the pressure cooker basket. Add about one cup of water into the cooker base, cover carefully, and seal the lid. Pressure cook at high pressure for about 10 minutes, then let the pressure release naturally to get the best texture.
Smart Shortcuts for Busy Days
- Freeze your butter cubes in advance. That way when you wanna bake, you just grab and toss ‘em in—no waiting around for butter to chill.
- Mix your dry ingredients the night before. It saves time in the morning, and the flavors get a little deeper when they hang out together.
- Use a cookie scoop to make sure your dough balls are all the same size. This way your cookies cook evenly without any guesswork.
- Instead of fresh mixing each time, double the batch and freeze half the dough. When you want cookies later, just thaw and scoop straight into the cooker. Super handy when you're short on time.
The Flavor Experience Waiting for You
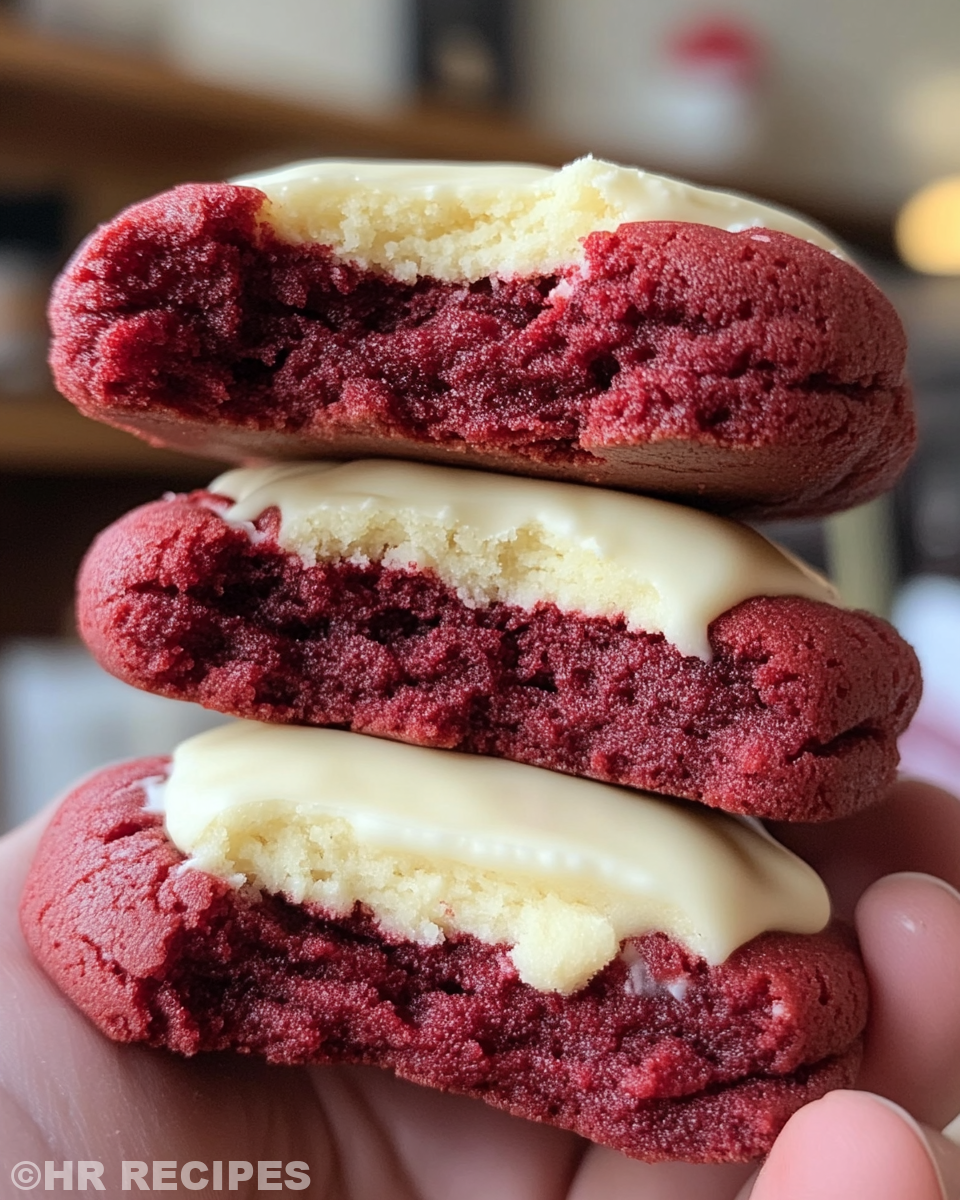
When you catch that first bite, you’re hit with deep, rich cocoa that’s mellowed by the signature red velvet tang. It’s smooth and soft, not crumbly, kinda melts in your mouth but with a little chew to keep it interesting.
Then there’s the sweet white chocolate chips that pop in every bite, a creamy surprise that cuts through the cocoa richness. It’s like a little cupid’s bow of sweetness that makes you wanna grab another cookie real quick.
The cookies have a slightly crisp edge from the way pressure cooker seals steam and bakes without drying things out. Y’all get that perfect balance between tender inside and just enough crunch outside.
Plus the aroma while they cook just fills your kitchen with this warm, snuggly feeling y’all can’t help but smile at. It’s the kinda cookie that lifts your spirits on even the busiest days.
How to Store This for Later
If you got some cookies left over (or you decide to bake a double batch), storing them right keeps that happy texture and flavor around. You gotta pick the right method for how long you wanna keep ’em.
For short term, use an airtight container on the counter. Place a slice of bread inside the container with the cookies to keep them soft. Change bread slice every couple days if needed.
If you wanna keep ‘em longer, put cookies in a zip-top bag and freeze. When you want one, let it thaw at room temp for about 15 minutes. They taste just like fresh this way.
When reheating, avoid microwaving too long or you’ll lose nice chewy texture. Instead, pop them in a preheated oven or toaster oven for a few minutes to warm and revive the fresh-baked feel.
Your Most Asked Questions Answered
- Can I use regular oven instead of the pressure cooker? Yeah, you can bake these in the oven at 375°F like traditional cookies. But you’ll miss out on the uniquely soft inside and perfectly moist texture pressure cooking offers.
- Why cold butter instead of softened? Cold butter chunks create pockets in the dough that melt slowly, yielding that thick, chunky texture Levain is famous for.
- What if I don’t have red food coloring? You can skip it, but the red velvet vibe won’t be there. Sometimes natural juices like beet juice can work but they might affect texture and color differently.
- How do I know when the cookies are done in the pressure cooker? You use the steam cues and timing that suggest about 10 minutes at high pressure plus natural release. The sealing ring keeps all that moisture in perfect balance.
- Can I add nuts or swaps to the recipe? Sure, chopped pecans or walnuts mix real well with red velvet and white chocolate. Just fold when you mix the chips.
- Why white chocolate, not dark or milk? White chocolate melts creamy without bitterness so it balances the cocoa’s depth. Dark could overpower the delicate flavors y’all want in red velvet.
Related Recipes You Might Enjoy
Love this pressure cooker method? Check out our other easy and tasty recipes like the Classic Crockpot Pierogi Casserole with Kielbasa for a comforting dinner, or try Mozzarella Stuffed Rosemary Parmesan Soft Pretzels as a savory snack to pair alongside your sweet treats. Also, our Easy Marinated Cheese Appetizer with Salami & Green Olives brings a burst of flavor perfect for any gathering.
Levain Bakery Style Red Velvet Cookies in the Pressure Cooker
Equipment
- 1 Mixing bowl Large
Ingredients
Main ingredients
- 1 cup unsalted butter cold and cubed
- 1 cup brown sugar packed
- ½ cup granulated sugar
- 2 eggs large
- 2 tablespoon red food coloring
- 1 tablespoon cocoa powder
- 1 teaspoon vanilla extract
- 2 ½ cups all-purpose flour
- 1 teaspoon baking powder
- ½ teaspoon baking soda
- ½ teaspoon salt
- 1 ½ cups white chocolate chips
Instructions
Instructions
- Gather all ingredients and prep your cooking gear. Get your pressure cooker ready, and make sure the sealing ring is clean and well-fitted so no steam escapes during cooking.
- Cream together the cold cubed butter with both sugars until you get a light and fluffy mix. Don't rush this part since it builds your cookie's structure.
- Add the eggs, red food coloring, and vanilla extract to the butter mix. Mix everything well until you get a nice red velvet color with creamy texture.
- In a separate bowl, whisk the flour, cocoa powder, baking powder, baking soda, and salt. This pre-mix helps your dry ingredients blend even in the wet dough.
- Gradually add the dry mix into the wet batter. Stir gently just until you don't see flour anymore. Overmixing can toughen the dough, so keep it easy.
- Fold in those white chocolate chips slowly so they spread evenly through the batter without breaking up much.
- Scoop big dollops of dough on a piece of parchment paper inside the pressure cooker basket.
- Add about one cup of water into the cooker base, cover carefully, and seal the lid.
- Pressure cook at high pressure for about 10 minutes, then let the pressure release naturally to get the best texture.


