
That first hiss from the cooker tells you something good is happening. You remember standing there, waiting, the sound kinda comforting after a long day. It means that pressure's built and y'all are about to get some heck of a treat.
Once that float valve pops up, you know you gotta time things right. It’s this moment that gets you excited to see how those flavors blend under all that heat. You spot the steam sneaking out a little and think dang, smells like heaven.
When it’s time for natural release, you let your patience shine. Slow release works real good for these snickerdoodles so they get that tender pull you’re after. You feel kinda proud knowing you made something that smells this good from your own kitchen.
Why Your Cooker Beats Every Other Pot
- It builds pressure fast, locking in flavors like no other pan can.
- You control the steam with that sealing ring, keeping everything moist.
- The float valve’s your best friend for knowing when the cooker’s ready.
- Natural release lets your cookies finish cooking gentle, perfect for that tender texture.
- With slow release, you avoid sudden changes that can mess up your sweets.
Make sure your sealing ring is checked before every batch; a cracked one can affect pressure build-up, as described in our Classic Crockpot Pierogi Casserole with Kielbasa post on pressure cooker tips and tricks. Understanding your cooker’s natural release process ensures moist results every time.
The Complete Shopping Rundown
You’ll want to grab 1 cup of unsalted butter, softened just right. It’s what gives your snickerdoodles that rich base flavor you crave. Then you gotta get 1 and a half cups of granulated sugar to sweeten things up real good.
Don’t forget 2 large eggs to bind everything into a smooth, chewy dough. You also need 2 and three quarter cups of all-purpose flour to get the perfect structure going. Pick up 2 teaspoons of cream of tartar and a teaspoon of baking soda that make your cookies rise nice and soft.
A quarter teaspoon of salt sneaks in to balance the sweetness just like you want. And for that classic cinnamon sugar coating, grab 2 tablespoons of granulated sugar and 1 and a half teaspoons of ground cinnamon. With these in hand, you’re set to whip up y’all’s new favorite treat.
For more on selecting ingredients for baking, you might enjoy our guide on Amish Dinner Rolls, which shares tips on ingredient quality that translate well to all kinds of baking.
Your Complete Cooking Timeline
Step one, you preheat your pressure cooker’s oven mode or set a baking tray if using an electric cooker to 375°F. This gets things ready for your dough to bake just right. Then you line your baking sheets with parchment paper to keep your snickerdoodles from sticking.
Step two, cream your unsalted butter with the 1 and a half cups granulated sugar until it’s light and fluffy. This part takes a little elbow grease but dang it’s worth it for that texture. Step three is adding the eggs, one at a time, beating well after each to keep it smooth.
Step four, mix all your dry stuff—flour, cream of tartar, baking soda, and salt—in a bowl. Then step five, slowly add the dry mix to the wet ingredients, stirring until just combined. Don't overdo it or cookies turn tough.
Step six has you rolling dough into one-inch balls, then dipping each into a cinnamon-sugar mix you made from 2 tablespoons sugar and 1 and a half teaspoons cinnamon. Step seven, place those balls a couple inches apart on your sheet. Bake for 8 to 10 minutes. You'll know they’re done when edges set, centers still soft.
After baking, remove from oven and let cookies cool on the sheets for 2 minutes before moving to wire racks so they don’t break. This timeline keeps you on track and your snickerdoodles tasting like a tender little dream.
Valve Hacks You Need to Know
- Check your sealing ring before cooking cause if it’s cracked or old, the pressure won’t build right.
- Use natural release mostly to let your cookies finish without the sudden drop that can flatten ‘em.
- Don’t rush slow release; letting the steam fade naturally keeps moisture locked and your snickerdoodles tender.
- If the float valve sticks, gently wiggle it after cooking to release built-up pressure safely.
- When adding water below the rack in your cooker, measure carefully so it doesn’t drip onto your treats.
For more tips on slow release and valve care, check out our detailed guide from Classic Crockpot Pierogi Casserole with Kielbasa.
What It Tastes Like Fresh From the Pot
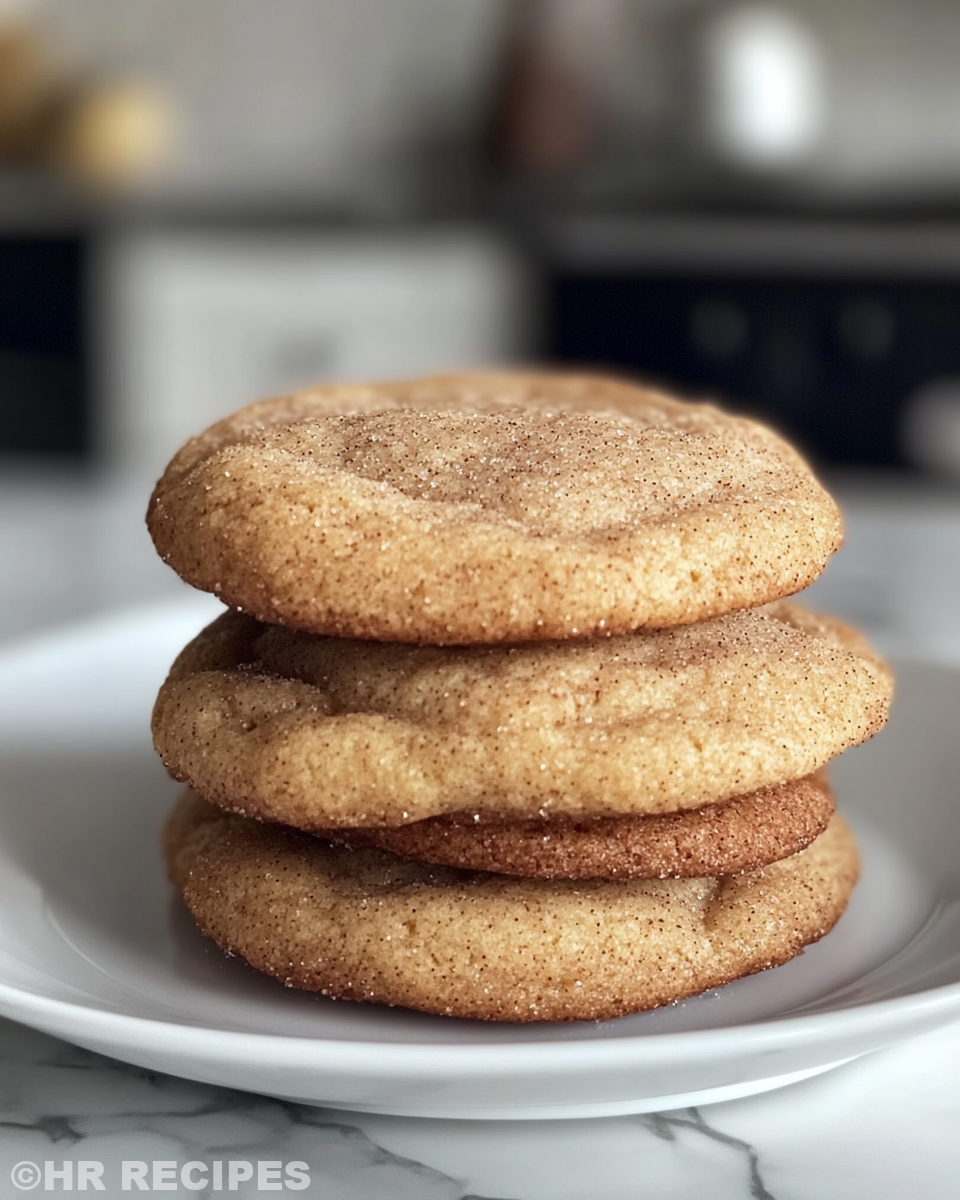
Right outta the cooker, these snickerdoodles got a soft, tender pull that melts in your mouth. You notice the cinnamon sugar dusting is just right—a little crispy outside and soft sweet inside. It’s kinda like a warm hug but with sugar.
The butter flavor shines through real good, almost creamy, making each bite feel indulgent but not too heavy. You spot that tiny crisp edge with a chewy center, the kinda combo that keeps you coming back for one more.
The aroma alone can fill your room with that cinnamon-spice vibe that feels like fall no matter what. You remember why you love baking these little gems in your cooker—it’s that perfect taste and texture no oven can match.
Keeping Leftovers Fresh and Ready
If you got leftovers (which might not happen, no judging), store them in an airtight container at room temp. It keeps that tender texture nice for a couple days. You can also try wrapping ‘em tightly in plastic wrap to keep out air.
For longer storage, pop the cooled cookies in the freezer inside a zip bag. Just thaw them out on the counter before you want a snack and they’ll be ready to go. Avoid fridge storage cause it tends to dry cookies out faster.
You can always reheat slightly in your cooker on low to get a fresh-baked feel again. Just a few seconds on warm and they soften back up real nice. With these tips, you got your snickerdoodles ready anytime!
Everything Else You Wondered About
Q: Can I substitute butter with margarine?
A: You can but butter gives you better flavor and texture, so try to stick with it if you can.
Q: What’s the deal with cream of tartar?
A: It’s a leavening agent that helps give snickerdoodles that slight tang and helps them rise chewy and soft.
Q: How do I know when to use natural release?
A: For these cookies, letting the pressure drop slow and natural keeps ‘em tender and perfect.
Q: Can I skip the cinnamon-sugar coating?
A: You could but that cinnamon sugar is what makes snickerdoodles special, so don’t skip it unless you really gotta.
Q: What if my float valve won’t pop up?
A: Check your sealing ring and water level, sometimes the valve sticks and a gentle wiggle helps release pressure safely.
Q: How to make sure cookies don’t stick?
A: Always line your baking sheets with parchment paper or a silicone mat before placing dough balls.
Don’t forget to explore other recipes that complement your baking skills like the Easy Marinated Cheese Appetizer with Salami & Green Olives or try your hand at savory dishes with Cheesy Kielbasa Hashbrown Casserole Dump Meal Recipe. These spread the joy across your table with delicious variety.
My Favorite Snickerdoodles
Equipment
- 1 Stand or Handheld Mixer
- 2 Large bowls
- 1 Cookie sheet
- 1 Plastic wrap
Ingredients
Main Ingredients
- 2 ½ cups All-purpose flour
- 2 teaspoons Cream of tartar
- 1 teaspoon Baking soda
- ½ teaspoon Salt
- ½ cup Unsalted butter at room temperature
- ½ cup Vegetable shortening
- 1 ¾ cups Granulated sugar divided
- 2 Large eggs
- 1 ½ teaspoons Ground cinnamon
Instructions
Instructions
- In one bowl whisk together the flour, cream of tartar, baking soda, and salt.
- In a separate bowl, use mixer to cream butter and shortening until light and fluffy.
- Add 1 ½ cups of sugar and mix until combined.
- Add eggs one at a time, mixing well after each addition.
- Add dry ingredients in two additions and mix by hand until just blended.
- Form dough into a ball, cover with plastic wrap, and refrigerate for 6-8 hours or overnight.
- Preheat oven to 350°F and line baking sheet with parchment paper.
- Divide dough into quarters, form logs, slice each log into 12, and roll into balls.
- Mix remaining ¼ cup sugar with cinnamon, and roll each dough ball in mixture.
- Bake for approx. 10 minutes. Cool on sheet for 5 minutes before transferring to wire racks.


