
That first hiss from the cooker tells you something good is happening. You sense that cozy feeling settling in the kitchen. It’s kinda like the first sign of a holiday treat almost ready to explode in flavor. It’s not just noise, it’s promise.
When the valve hiss finally slows down and the steam cues fade, you feel something shift. That broth depth of warmth inside the pot is where the cookie dough’s gonna soften just right. You recall the excitement you felt waiting for natural release, knowing it’s gonna be tender pull perfection.
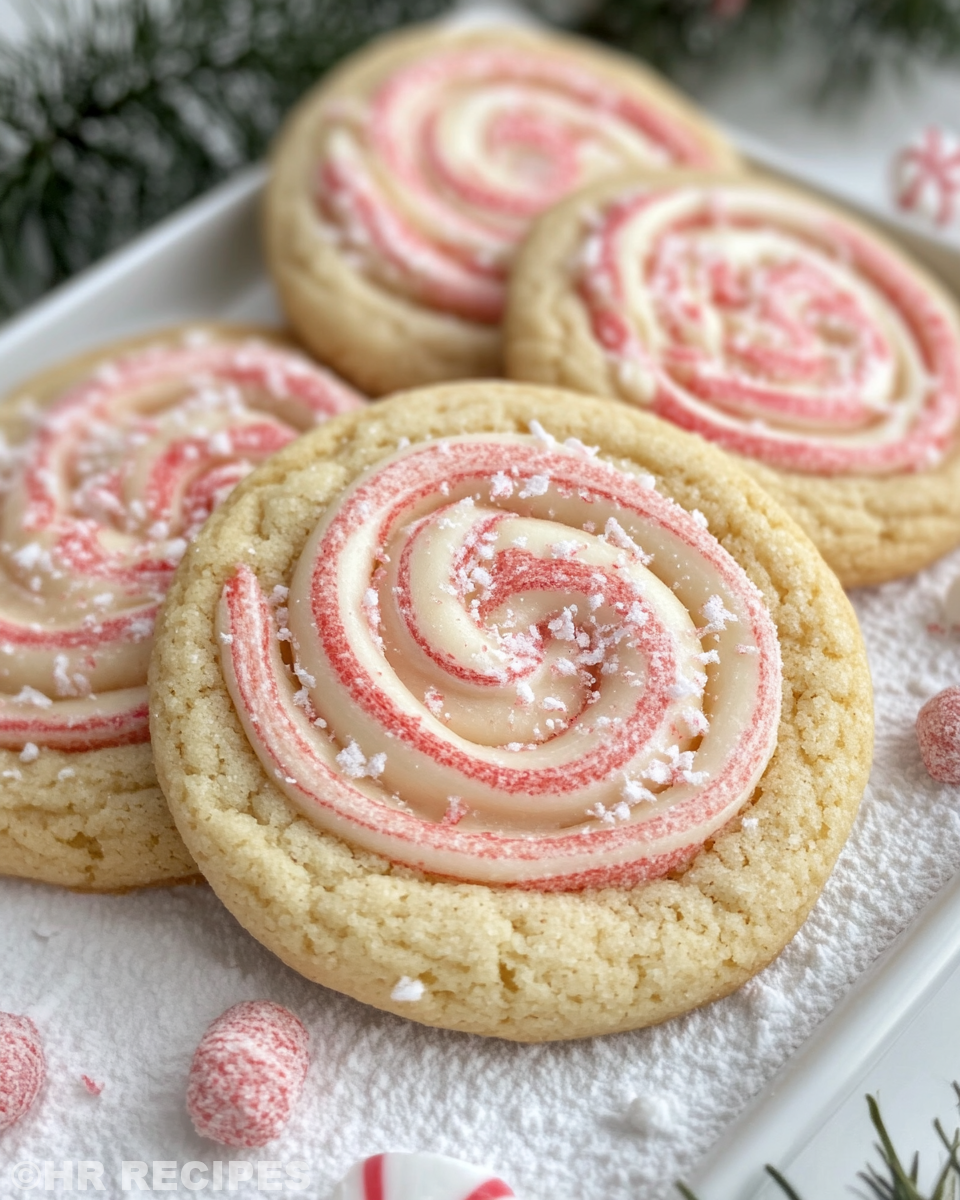
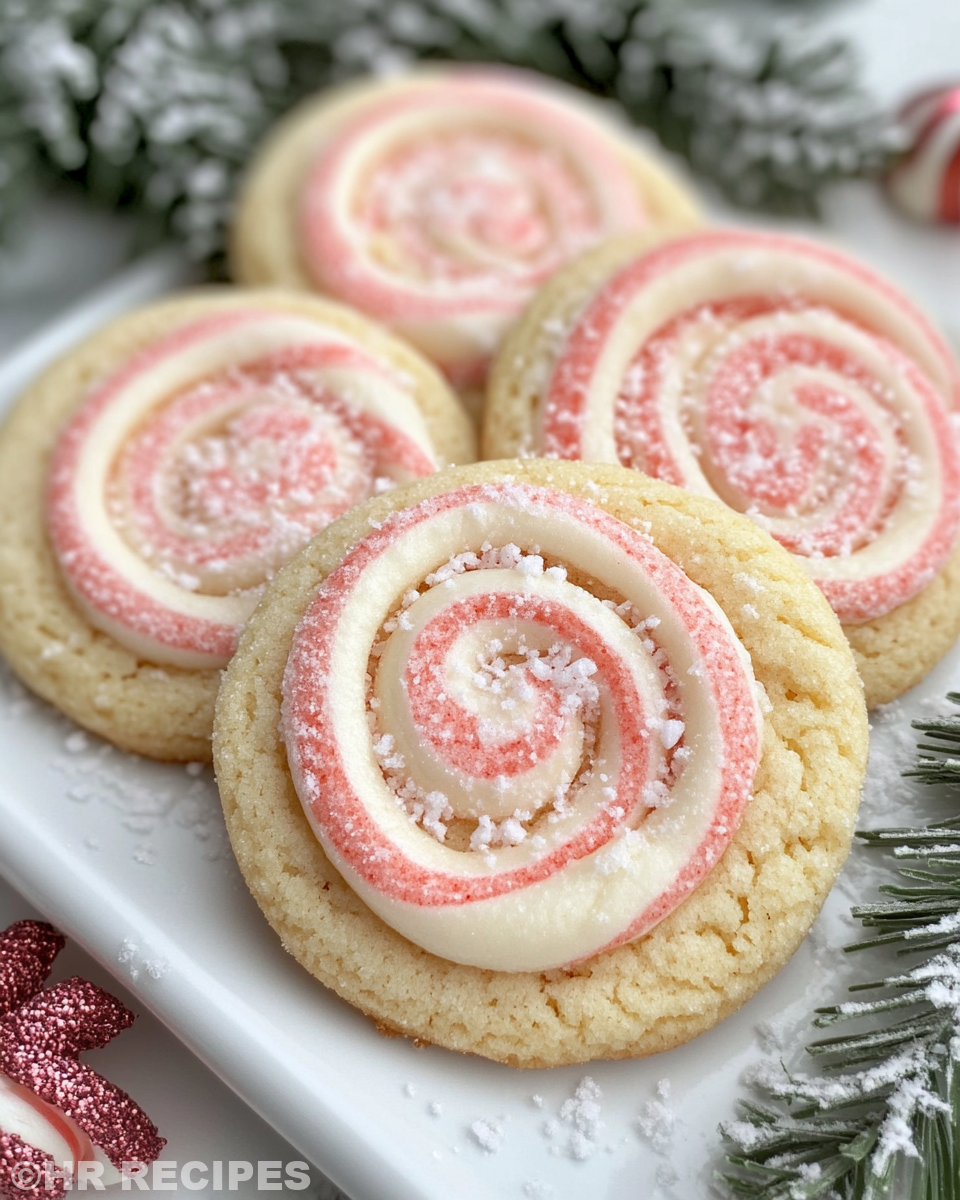
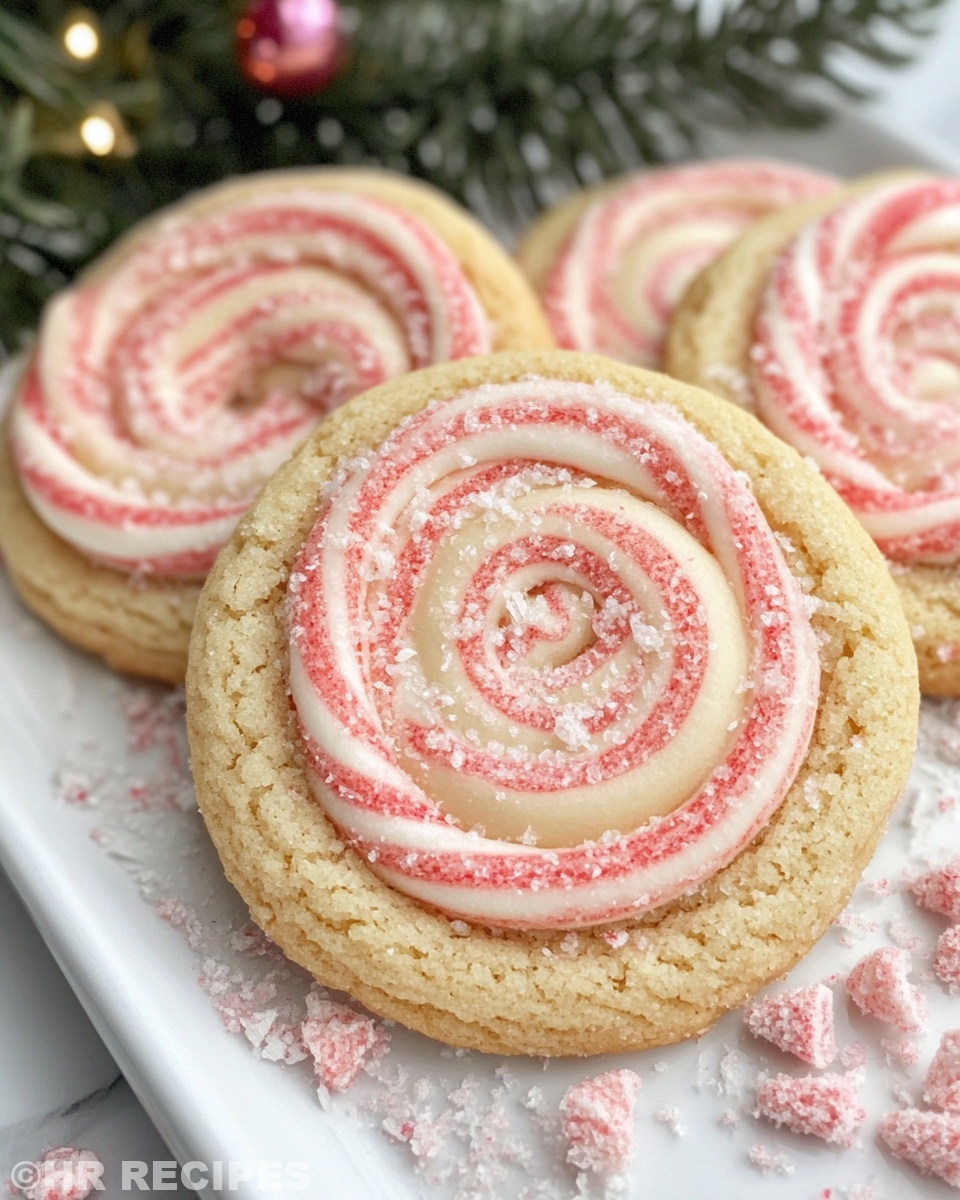
Mixing the peppermint scent with those red and green swirls, you remember how fun it was rolling the dough into a perfect pinwheel log before chilling it. It’s the kind of project that feels special, like you’re crafting your holiday memories one swirl at a time. Baking’s about more than food here, it’s moments you keep.
Why Your Cooker Beats Every Other Pot
- Steady pressure keeps your cookies evenly moist and tender.
- Speedy hot steam means you save time without losing flavor.
- Broth depth inside cooks dough gently, helping flavors meld.
- Natural release avoids overcooking, making every bite soft.
- Valve hiss lets you know exactly when the cooker’s working its charm.
- Less oven use means less heat in your kitchen during busy seasons.
- Easy cleanup so you can spend more time enjoying your treats.
Check out our Classic Crockpot Pierogi Casserole with Kielbasa for another comforting meal made easy in your cooker.
All the Pieces for This Meal
- 225 g unsalted butter – you want it softened for easy creaming.
- 275 g caster sugar or superfine sugar – sweet and smooth.
- ¼ teaspoon fine sea salt – just a touch to balance flavors.
- 2 medium eggs – these bind everything beautifully.
- 2 teaspoons peppermint extract – the heart of that festive flavor.
- 375 g plain (all-purpose) flour – gives structure to your cookies.
- ½ teaspoon baking powder – a small lift for light texture.
- Red food colouring gel – to make those bright, cheery swirls.
- Green food colouring gel – makes the pinwheel pop with holiday vibes.
- Red, green, and white sprinkles – the fun festive touch for decorating edges or tops.
This bunch works together to make the dough perfect for rolling and cutting. You gotta chill it for a bit so it firms up for neat pinwheels. The peppermint extract really makes the cookies sing, so don’t skip it!
Walking Through Every Single Move
- Cream butter and sugar – In a large bowl, beat together the softened butter and caster sugar until it’s light and fluffy. You’ll see it kinda double in size, which means you’re on the right track.
- Add eggs and extracts – Crack in the eggs one at a time, mixing well after each. Then stir in the peppermint extract and salt. The smell you get here is already something special.
- Mix dry ingredients – In a separate bowl, whisk the flour and baking powder. Slowly add this mix to your wet stuff, stirring gently till it all sticks together as dough. Don’t overwork it or the cookies won't be tender.
- Dye and roll your dough – Split the dough into two. Add red food colouring to one, green to the other. Mix until the colors look even and fun. Roll each between parchment paper into rectangles about 1 cm thick. Chill for 30 mins so they firm up.
- Make your pinwheel log – Peel off the top paper and stack one coloured dough on top of the other. Roll them up from the longer end to get that swirly pinwheel effect. Wrap this log in parchment and refrigerate at least an hour till firm.
- Bake and decorate – Preheat your oven to 180°C (350°F). Slice your chilled logs into 1 cm rounds and place on lined trays. Sprinkle on your red, green, and white sprinkles as you please. Bake 10–12 minutes till edges turn light golden. Let them cool on trays for 5 minutes, then move to wire racks.
Time Savers That Actually Work
- You can cream the butter and sugar while your cooker heats up to get two steps going at once.
- Use parchment paper to roll dough quicker and no sticky mess, saving cleanup time.
- Chill your dough in the freezer instead of fridge if you gotta speed things up, but check it often so it doesn’t freeze solid.
- Prep and slice the logs ahead, then bake last minute for fresher cookies right before guests arrive.
Your First Taste After the Wait
You bite in and the cookie’s soft, kinda tender but with just the right snap on the edges. The peppermint greets your nose and hits your tongue like a fresh winter breeze. You feel the red and green swirls disappear in a peppermint hug.
The sprinkles add a sweet crunch and make the cookie feel extra festive, kind of like holiday confetti in every bite. The sweetness isn’t overpowering but balanced real nice with that subtle salt you added.
It’s that wonderful blend of cozy and bright you wanna serve with hot cocoa or a cold glass of milk. You recall how good waitin' for that natural release was cause these came out perfect every time you try.
How to Store This for Later
- Room temperature – Keep cookies in an airtight container for up to a week. The sprinkles keep that crunch and the peppermint stays fresh.
- Refrigerator – Stash leftover cookies in sealed containers to last two weeks if you want them colder and chewier.
- Freezer – Wrap your cookie logs tightly in parchment and foil before freezing. Thaw in fridge overnight before slicing and baking for fresh-baked taste anytime.
- After baking freeze – You can freeze fully baked cookies in layers separated by parchment paper. Thaw at room temp a few minutes before eating to keep that tender pull texture.
Everything Else You Wondered About
- Q: Can I skip the peppermint extract? A: You can, but the cookies kinda lose their holiday sparkle without it. Try vanilla instead if you wanna switch things up.
- Q: Will the pressure cooker affect baking time? A: You actually bake these in the oven, but the cooker helps with dough chill times and keeps your kitchen cool.
- Q: What if my dough is too sticky? A: Add a pinch more flour and chill it longer. Sticky dough is tough to roll and slice neat.
- Q: What’s natural release, and why does it matter? A: Natural release means letting the cooker cool down without quick venting. It lets cookies stay tender and not dry out.
- Q: Can I change sprinkles colors? A: Totally, use whatever holiday colors or shapes you like. It’s your cookie party, make it yours.
- Q: How thick should I roll the dough? A: About 1 cm thick so it’s easy to roll and slice while still baking evenly.
For a festive treat and other easy cooking, you might also try our Easy Marinated Cheese Appetizer with Salami & Green Olives, perfect for holiday gatherings, or warm up with a Cheesy Kielbasa Hashbrown Casserole for a family-friendly comforting dinner. If you’re craving something with a fun and unique twist, check out our Mozzarella Stuffed Rosemary Parmesan Soft Pretzels to impress at your next party. These recipes bring more joy and flavor to your kitchen all season long.

Christmas Pinwheel Cookies in Your Pressure Cooker
Equipment
- 1 Mixing bowl large
- 1 Non-Stick Baking Sheet
- 1 Baking Parchment Paper
Ingredients
Main Ingredients
- 225 g Unsalted butter softened
- 275 g Caster sugar or superfine sugar
- 0.25 teaspoon Fine sea salt
- 2 Eggs medium
- 2 teaspoon Peppermint extract
- 375 g Plain flour or all-purpose flour
- 0.5 teaspoon Baking powder
- Red food colouring gel
- Green food colouring gel
- Red, green, and white sprinkles for decorating
Instructions
Instructions
- Cream butter and sugar – In a large bowl, beat together the softened butter and caster sugar until light and fluffy.
- Add eggs and extracts – Crack in the eggs one at a time, mixing well after each. Stir in peppermint extract and salt.
- Mix dry ingredients – Whisk together flour and baking powder. Add slowly to the wet mix until it forms a dough.
- Split dough and add coloring – Divide dough in two. Add red coloring to one half and green to the other. Mix each until color is even.
- Roll dough into rectangles – Roll each dough between parchment paper about 1 cm thick. Chill for 30 minutes.
- Stack and roll – Place one dough on top of the other and roll into a pinwheel log. Wrap and chill at least 1 hour.
- Preheat oven to 180°C (350°F) and line baking trays with parchment paper.
- Slice cookie log – Cut into 1 cm rounds using a sharp knife and place on baking trays.
- Add sprinkles – Decorate slices with red, green, and white sprinkles before baking.
- Bake 10-12 minutes – Until edges are light golden. Let cool on trays 5 minutes, then move to wire racks.
- Store cooled cookies – Use airtight containers to keep fresh for up to a week.
- Freeze extra logs – Wrap in foil and parchment. Thaw in fridge before slicing and baking.


