That first hiss from the cooker tells you something good is happening. You spot the steam building up, kinda like a promise that supper's on its way real soon. The sealing ring does its job keeping all that pressure tight inside the pot which lets everything cook faster than you'd think possible.
When the pressure build hits its peak, you just know the broth depth and flavors are mixing perfectly together under that steam. You notice how the cooker kinda hums, a steady sign that things are going smooth. It's a weird comfort, that sound telling you dinner's gonna be great.
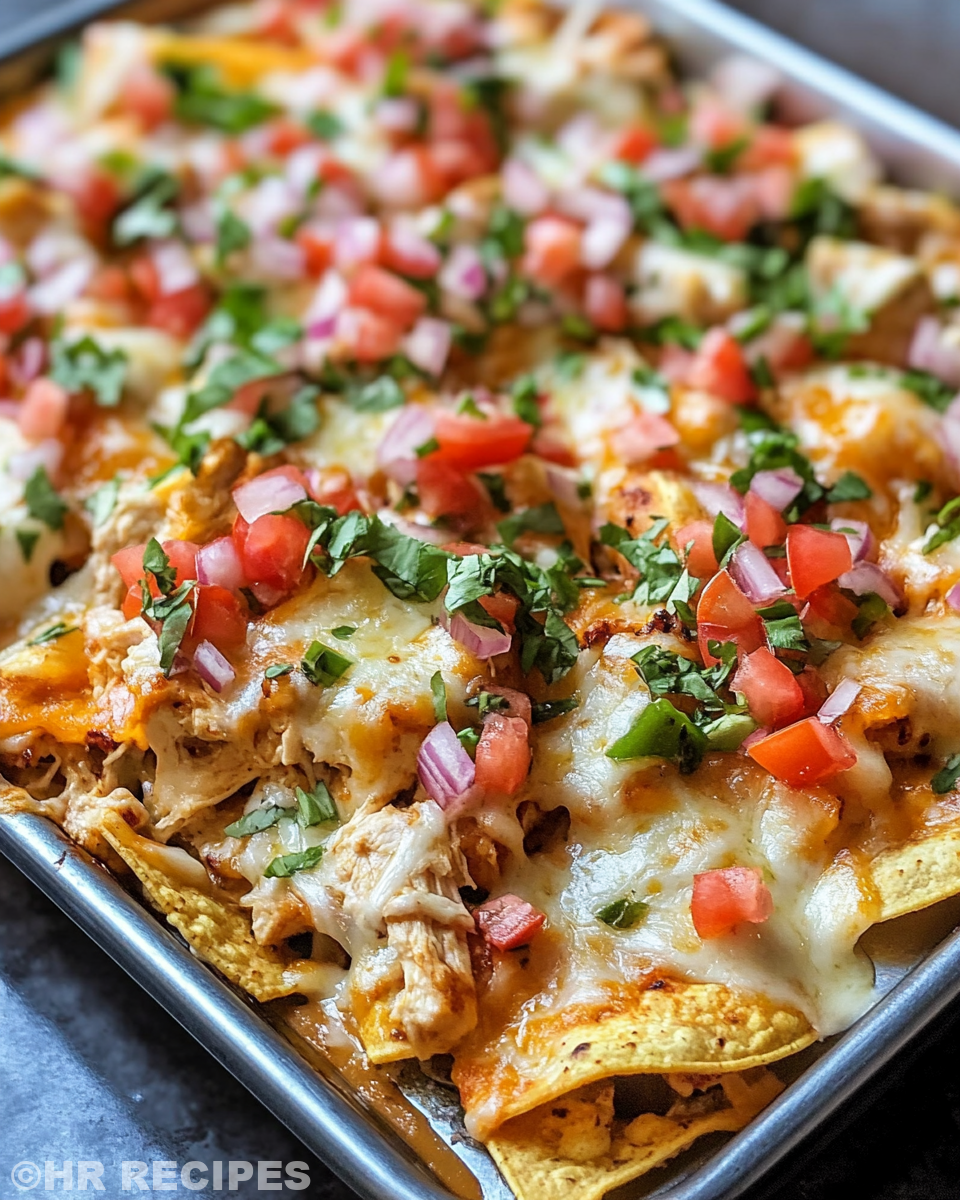
As you wait for that natural release, you start thinking about what toppings you wanna slap on these nachos. It’s always a little rush holding back till the slow release lets you peek inside. But once it does, man does that cheesy, chicken loaded sheet pan nacho sight pull you in.
What Makes Pressure Cooking Win Every Round
- You cut your cook time in half or even better.
- Flavor gets locked in deep thanks to that high pressure steam.
- Less mess for you because everything cooks mostly inside one pot.
- The sealing ring trapped all juicy goodness so nothing dries out.
- Natural release means the food rests and stays tender till you're ready to dig in.
Pressure cooking isn’t just fast, it’s also a magic trick for flavor. Linking how the slow cooker pierogi kielbasa casserole melds tastes slowly, pressure cooking traps flavors in a flash—except here it’s with steam instead of slow heat.
Many pressure cooker cooks swear natural release keeps meats tender and helps keep cheese from breaking down too quick. If you want low fuss and maximum flavor, pressure cook your chicken before layering your nachos and see the wins yourself.
All the Pieces for This Meal
- 1, 12 oz. bag corn tortilla chips (thick ones work better for holding toppings)
- 1 rotisserie chicken, shredded (around 3-4 cups)
- 1 tablespoon taco seasoning
- ½ teaspoon salt
- ½ teaspoon pepper
- 16 oz cheese—Monterey jack, cheddar, or Colby
- 1, 15.5 oz can pinto beans, drained and rinsed
- 1, 15 oz can black beans, drained and rinsed
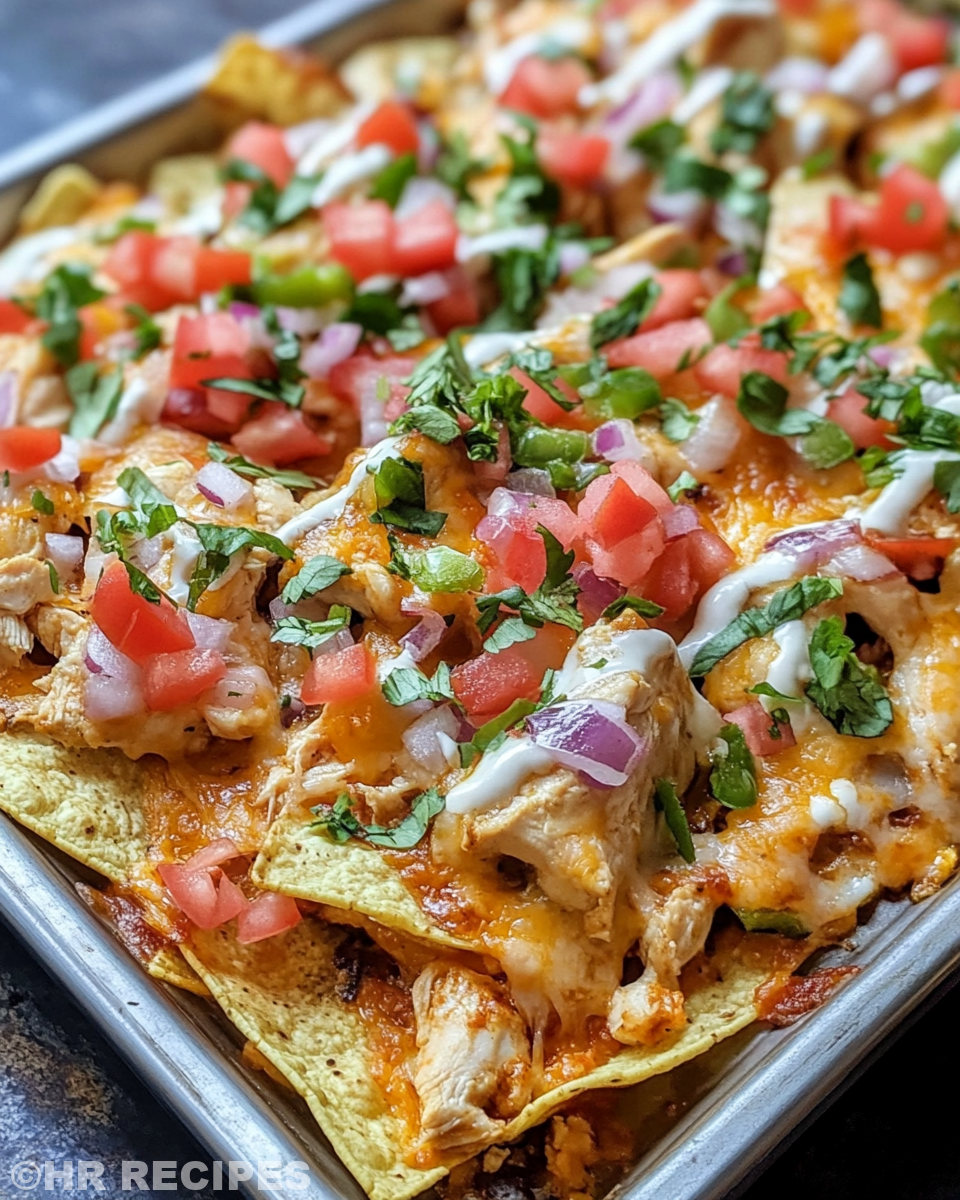
- Toppings like sour cream, guacamole, pickled jalapenos, green onions, tomatoes
- Extras such as salsa, red onion, olives, shredded lettuce, cilantro, limes, pico de gallo, hot sauce
You really want thick chips here so they don't fall apart when loaded up. The rotisserie chicken makes this easy—you just shred and season. Then grab your favorite cheese, and don’t forget the beans for heartiness. All those toppings? They’re the fun part you can change every time.
For variations on cheese, consider starting with Monterey Jack or throw in some Colby. Check out topping ideas in our Easy Marinated Cheese Appetizer with Salami & Green Olives for flavor inspiration
Walking Through Every Single Move
Step one, preheat your oven to 400 degrees F (that’s 200 degrees C for y’all using metric). You want it hot and ready to get that cheese melty.
Step two, line a big sheet pan with parchment or foil. Cleanup’s gonna be way easier this way, trust me.
Third, spread your tortilla chips evenly across the pan. You want a nice, flat layer so every chip gets some love.
Next, mix your shredded chicken with taco seasoning, salt, and pepper in a big bowl. Make sure all the chicken pieces get coated good.
Now sprinkle half the cheese evenly over your chips. Then scatter the seasoned chicken on top. After that, add the pinto and black beans.
Sprinkle the rest of your cheese right over everything. This top coat is gonna get all bubbly and perfect in the oven.
Pop your pan in the oven for about 8 to 10 minutes, till the cheese is melted and bubbling just right. Pull it out and pile on your chosen toppings before serving it up hot.
For quick cleanup tips, check the foil method in our Cheesy Kielbasa Hashbrown Casserole Dump Meal Recipe—simple sheet pan tricks are a time saver.
Valve Hacks You Need to Know
- When using your pressure cooker before baking, double check that the sealing ring is snug and clean so no steam escapes.
- You can kinda speed up the natural release by toggling between sealing and venting positions carefully, but always watch out for a sudden steam burst.
- Slow release works good when you want meats super tender, but for nachos, be quick once the pressure build is done.
- If your beans look dry in the cooker, add an extra splash of broth or water to keep from scorchin’ the bottom.
- Keep your pressure cooker warm by covering it with a towel after cooking if you need to hold your chicken before assembling nachos.
Pressure cooker care can impact your results big time. For cleaning tips, see our Maple Sugared Cranberries post where we talk about freshening gear and avoiding lingering smells. Simple care equals best flavors.
When You Finally Get to Eat
Man, that first bite hits different. You sense the crispy crunch of thick chips layered with gooey, melty cheese. It’s the kinda comfort food that just wraps you up in flavor and warmth.
Your taste buds catch each layer—the spicy seasoned chicken, the creamy beans, and the tang of salsa or sour cream on top. You remember why you gotta make these for every party.
The messy thumbs you get from pulling apart chips piled high with toppings? Worth every crumb. You know you’ll be licking fingers and asking for more seconds fast.
It’s a full-on fiesta in your mouth with every bite, mixing textures and flavors that you built from scratch, pressure cooker style. It’s not just food, it’s an experience.

Your Leftover Strategy Guide
When the nachos don’t all get gobbled up, you gotta know how to save them right. First up, smash leftovers into an airtight container and stick 'em in the fridge. They last good for about 3 days.
Reheating? Oven’s best. Spread ‘em on a pan at 350 degrees F till cheese’s melty again and chips get a little crispy. Microwave makes it soggy but works in a pinch.
If you wanna save even longer, pull off the chicken and beans before freezing. Store those in freezer-proof bags separate from chips and cheese. When you’re ready, thaw and reassemble for fresher bites.
Everything Else You Wondered About
- Can I use fresh chicken instead of rotisserie? Totally. You’d just gotta pressure cook the chicken first until tender, then shred and season.
- What if I like my nachos extra crunchy? Use thicker chips and add cheese and toppings just before baking so they don’t get soggy.
- Any tips on beans? Rinse canned beans well to cut salt and starch, and drain them good so they don’t make chips mushy.
- Why natural release instead of quick release? Natural release helps keep chicken juicy and tender, slow release stops sudden steam bursts that might mess up your cheese layering.
- Can I make this vegetarian? Yep! Just swap chicken for extra beans and veggies like corn or bell peppers.
- What if pressure cooker smells after making chicken? Clean your sealing ring well and air it out after use. Smells tend to linger otherwise.
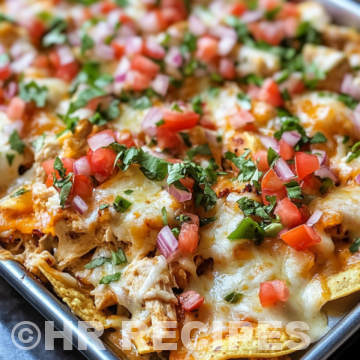
Sheet Pan Chicken Nachos
Equipment
- 1 Sheet pan large
Ingredients
Main Ingredients
- 1 12 oz. bag corn tortilla chips thick chips recommended
- 1 rotisserie chicken shredded (~3-4 cups)
- 1 tablespoon taco seasoning
- ½ teaspoon salt
- ½ teaspoon pepper
- 16 oz cheese Monterey jack, cheddar, or Colby
- 1 15.5 oz can pinto beans drained and rinsed
- 1 15 oz can black beans drained and rinsed
- toppings sour cream, guacamole, pickled jalapenos, green onions, tomatoes, olives, etc.
Instructions
Instructions
- Preheat the oven to 400°F (200°C).
- Line a large sheet pan with parchment paper or foil.
- Spread tortilla chips in an even layer across the pan.
- Mix shredded chicken with taco seasoning, salt, and pepper.
- Sprinkle half of the cheese over the chips.
- Evenly layer the seasoned chicken on top of the chips.
- Add the pinto and black beans over the chicken.
- Top everything with the remaining cheese.
- Bake for 8–10 minutes until cheese is melted and bubbly.
- Remove from oven and garnish with your favorite toppings before serving hot.