
Steam curls up from the valve and your stomach starts talking back. That warm, cozy feeling hits you at once, and you catch yourself craving something sweet and chocolaty. It's like your kitchen is telling you a good story is gonna happen real soon.
You spot the sealing ring snug on the lid, and the pressure cooker starts to buzz gently. You sense the valve hiss as it kicks into gear, building up that lovely, steady pressure. This recipe? It’s not just quick, it’s a heck of a way to get the comfort you deserve.
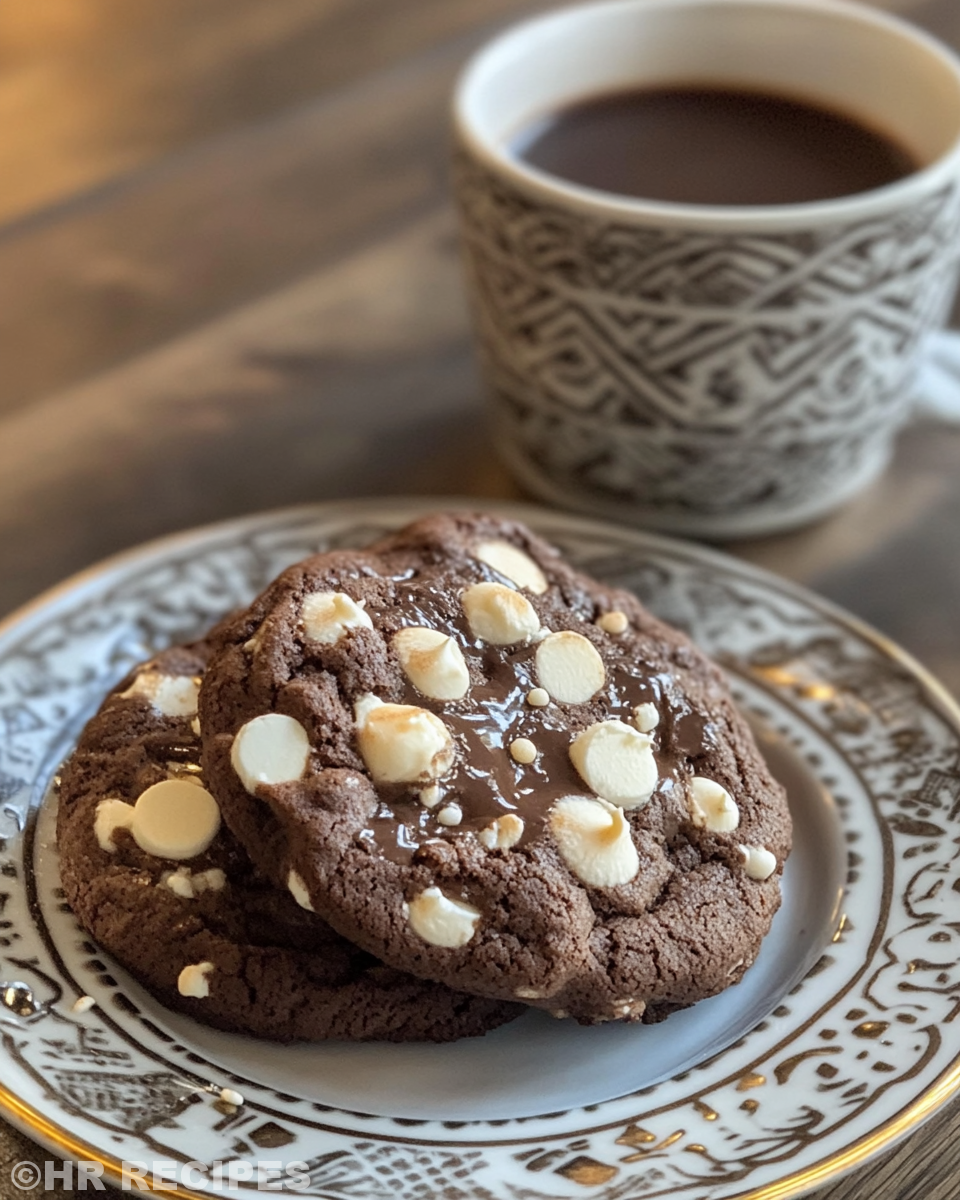
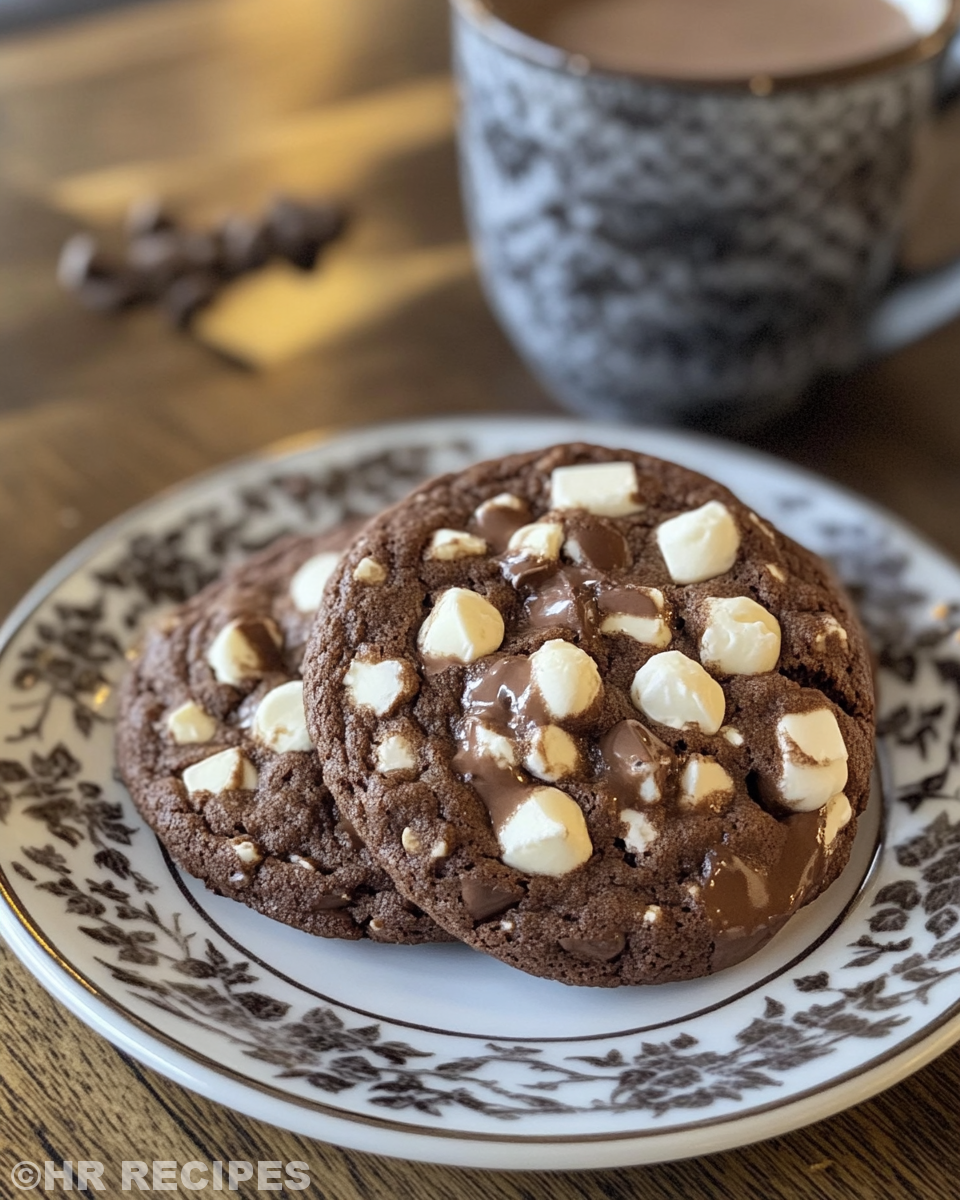
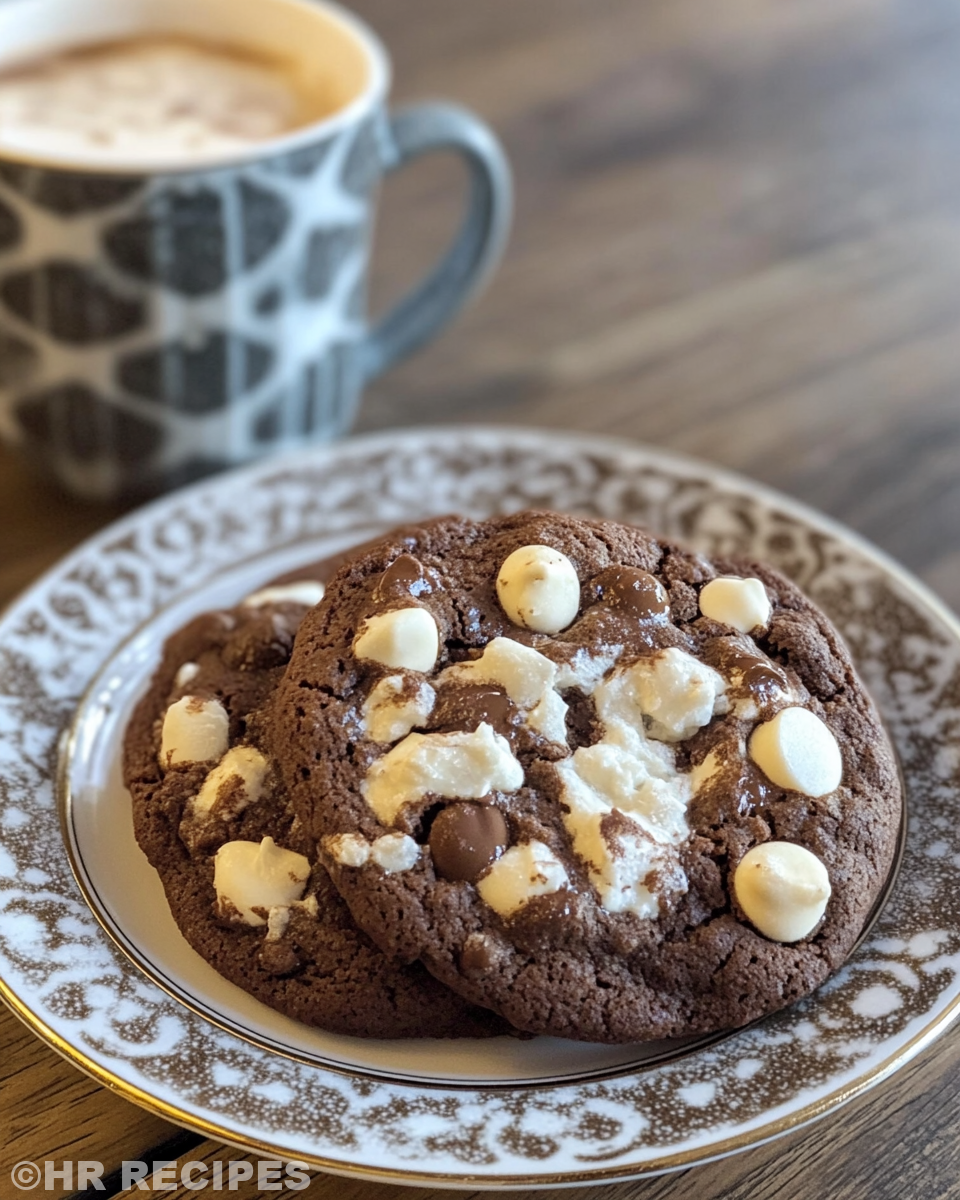
As the pressure builds, your mind drifts to the soft marshmallow bits melting right into the cookie dough. You remember how the marshmallows and chocolate chips play so nice together. Pretty soon, you’ll be biting into warm little clouds of goodness that you made yourself.
The Real Reasons You Will Love This Method
- You get soft, moist cookies without the fuss of long baking times.
- Pressure cooking locks in all that chocolatey flavor real good.
- The valve hiss signals when it’s working its charm, so you’re never guessing.
- Slow release means your cookies stay perfect and don’t dry out.
- Quick release lets you grab cookies faster when you’re in a hurry.
- Using a pressure cooker frees up your oven for other dishes, so multitasking is easy.
Your Simple Ingredient Checklist
- 1 cup butter softened you gotta make it nice and soft so it mixes easily
- 1 cup sugar regular white sugar does the trick
- ⅔ cup brown sugar packed a little for that moist sweetness
- 2 large eggs they help everything stick together just right
- 1 teaspoon vanilla brings out the warm flavors you love
- 3 ¼ cups all purpose flour this is the base that holds it all
- 4 packages hot cocoa mix or about ¾ cups make sure not sugar free because it won't taste the same
- 1 teaspoon salt balances the sweetness
- 1 teaspoon baking soda for that nice little rise
- 2 teaspoon baking powder extra puff for soft cookies
- 1 cup chocolate chips cause chocolate gotta be in every bite
- 1 cup Mallow Bits mini marshmallows are tempting but these are the real heroes here no sticky mess included
The Exact Process From Start to Finish
- First, you preheat your oven to 350°F and line your baking sheets with parchment paper to keep things neat.
- Grab a large bowl and cream together the softened butter, sugar, and brown sugar until the mix looks light and fluffy.
- Add the eggs one at a time, beating well after each addition so it all blends smooth, then mix in your vanilla.
- In a separate bowl, you whisk together the flour, hot cocoa mix, salt, baking soda, and baking powder to combine all the dry ingredients nice and even.
- Slowly add your dry mix to the wet stuff, mixing until just combined don’t overdo it or cookies get tough.
- Drop the dough by rounded tablespoons onto the lined baking sheets about 2 inches apart so they have room to spread.
- Throw the sheets in the oven, bake for about 9 to 11 minutes or until the edges start setting but centers stay soft like a dream.
- Once done, let the cookies cool on the sheet about 5 minutes before moving them to a wire rack this helps them firm up just right.
Easy Tweaks That Make Life Simple
- Try swapping regular sugar for coconut sugar for a deeper flavor if you’re feelin’ adventurous.
- If you don’t have Mallow Bits, add mini marshmallows right at the last minute of baking to avoid a sticky mess.
- Use chocolate chunks instead of chips to get bigger pockets of melty chocolate, y’all will love it.
The Flavor Experience Waiting for You
You bite into the Hot Chocolate Cookies and immediately, you sense that soft cocoa flavor melting on your tongue. It’s rich, kinda sweet but not overpowering, with those little pockets of chocolate surprise.
The Mallow Bits add a slightly chewy texture that’s just the right contrast to the tender cookie base. You catch hints of vanilla wrapping all the flavors together like a cozy blanket.
Because you used the pressure cooker method, every bite stays moist and fresh tasting, like you just pulled them from the oven even hours later. It’s like a warm hug in cookie form, plain and simple.
Keeping Leftovers Fresh and Ready
If you’ve got cookies left over (and who doesn’t), here’s how you keep ’em tasting just right. Store sealed in an airtight container at room temp for up to 4 days to keep ’em deliciously soft.
Want ’em longer? Pop the cookies in the freezer wrapped tight in plastic wrap and then a freezer bag. They will last a good couple months that way. Just thaw at room temp before digging in.
For a quick refresh, microwave individually for about 10 seconds or toast lightly in the oven for a few minutes and you got yourself freshly revived cookies that are soft and melty again.
Common Questions and Real Answers
- Can I use mini marshmallows instead of Mallow Bits? Mini marshmallows tend to get mushy and sticky in this recipe so it’s best to use Mallow Bits to keep your cookies perfect.
- Do I really need the slow release step? Slow release helps maintain that soft texture so your cookies won’t dry out after cooking.
- What if my pressure cooker doesn't have a quick release? That’s okay just go with slow release but it might take a couple extra minutes to finish.
- Can I double this recipe? Totally but make sure your pressure cooker is big enough and don’t overcrowd the baking sheets.
- Why is the sealing ring important? The sealing ring helps keep all the steam inside for proper pressure build which makes your cookies just right.
- Can I use a sugar free hot cocoa mix? Nope sugar free versions don’t give you the sweet balance needed for this recipe so stick with the regular stuff.
For related recipes, check out our Cheesy Kielbasa Hashbrown Casserole Dump Meal Recipe for a quick and easy option using kielbasa, or explore Mozzarella Stuffed Rosemary Parmesan Soft Pretzels featuring cheesy, herbed treats perfect for snacks. Also, don’t miss our Easy Marinated Cheese Appetizer with Salami & Green Olives as a savory delight to complement your meals.
Hot Chocolate Cookies Made Easy in Your Pressure Cooker
Equipment
- 1 Mixing bowl Large
Ingredients
Main ingredients
- 1 cup Butter softened
- 1 cup Sugar white, granulated
- ⅔ cup Brown sugar packed
- 2 Eggs large
- 1 teaspoon Vanilla extract
- 3 ¼ cups All-purpose flour
- ¾ cup Hot cocoa mix use 4 packages, not sugar free
- 1 teaspoon Salt
- 1 teaspoon Baking soda
- 2 teaspoon Baking powder
- 1 cup Chocolate chips
- 1 cup Mallow Bits dehydrated marshmallows
Instructions
Instructions
- Preheat oven to 350°F. Line baking sheets with parchment paper.
- Cream butter, sugar, and brown sugar in a large bowl until light and fluffy.
- Add eggs one at a time, mixing well after each. Stir in vanilla.
- In separate bowl, whisk flour, cocoa mix, salt, baking soda, and baking powder.
- Gradually mix dry ingredients into wet until just combined.
- Stir in chocolate chips and Mallow Bits until evenly distributed.
- Drop rounded tablespoons of dough onto prepared sheets, 2 inches apart.
- Bake 9–11 minutes until edges set. Cool 5 minutes on sheet, then transfer to wire rack.


