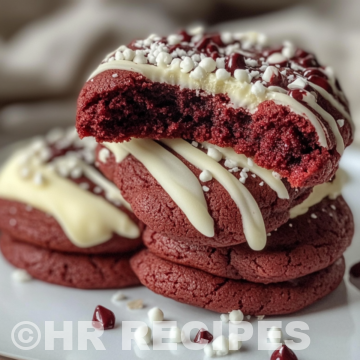
Red Velvet Chocolate Chip Cookies Pressure Cooker Way
Moist and tender red velvet chocolate chip cookies made with a pressure cooker and finished in the oven for the perfect texture and flavor combination.
Equipment
- 1 Mixing bowl medium and large for wet and dry ingredients
- 1 Electric mixer hand or stand mixer
- 1 Pressure Cooker
- 1 Baking sheet lined with parchment
Ingredients
Main Ingredients
- 210 g all-purpose flour spooned & leveled
- 21 g unsweetened natural cocoa powder
- 1 teaspoon baking soda
- ¼ teaspoon salt
- 113 g unsalted butter softened to room temperature
- 150 g light or dark brown sugar packed
- 50 g granulated sugar
- 1 large egg at room temperature
- 1 Tablespoon milk I recommend buttermilk
- 2 teaspoons pure vanilla extract
- ¾ teaspoon gel red food coloring or alternative
- 180 g white or semi-sweet chocolate chips plus a few extras for tops
Instructions
Instructions
- Preheat your oven to 350°F while preparing the pressure cooker.
- In a medium bowl, whisk together flour, cocoa powder, baking soda, and salt. Set aside.
- In a large bowl, beat the butter with brown sugar and granulated sugar until creamy, about 2 minutes on medium speed.
- Add the egg, milk, and vanilla extract. Beat until well combined, scraping down the sides if needed.
- Mix in the dry ingredients on low speed until the dough is thick. Do not overmix.
- Stir in the red food coloring and then gently fold in the chocolate chips, saving a few for topping.
- Scoop about 1.5 tablespoons of dough and roll into balls. Line them on parchment-lined sheets 2 inches apart.
- Cook the dough balls in the pressure cooker to steam and tenderize, then transfer them to the oven and bake for 10–11 minutes.
- Cool for 5 minutes on the baking sheet, then transfer to a wire rack to cool completely.
Notes
Chilling the cookie dough helps keep the centers soft. Use parchment or silicone mats for best results. Dough balls can be frozen and baked later with a few extra minutes added to time.